Archive | Uncategorized RSS feed for this section

Moneta Dress & Sewing Confidence

16 Mar

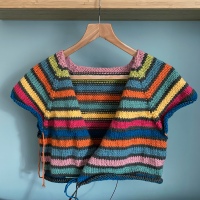
I wrote the following blog post back in March, just before full on lockdown. It seemed so trivial at the time to post it… so it’s sat in my drafts until now. I’m on holiday, it’s peeing down outside & I’m feeling a little reflective of what I’ve achieved over the year project wise & how lockdown has effected my creativity (I’ll probably write another post about that). I wore my Moneta dress for the first time today, now the weather has turned, so it seemed appropriate to share my post now.

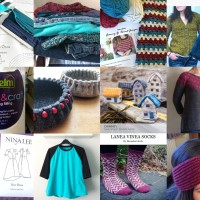
I’ve finished the first of my Make 9 projects for 2020 (beginning of March). Definitely off to a slow start, given we’re almost a quarter of the way through the year, however I’m still feeling confident. I have many of the projects in progress so maybe, just maybe I’ll get some complete by the end of the year!

Starting my Moneta Dress


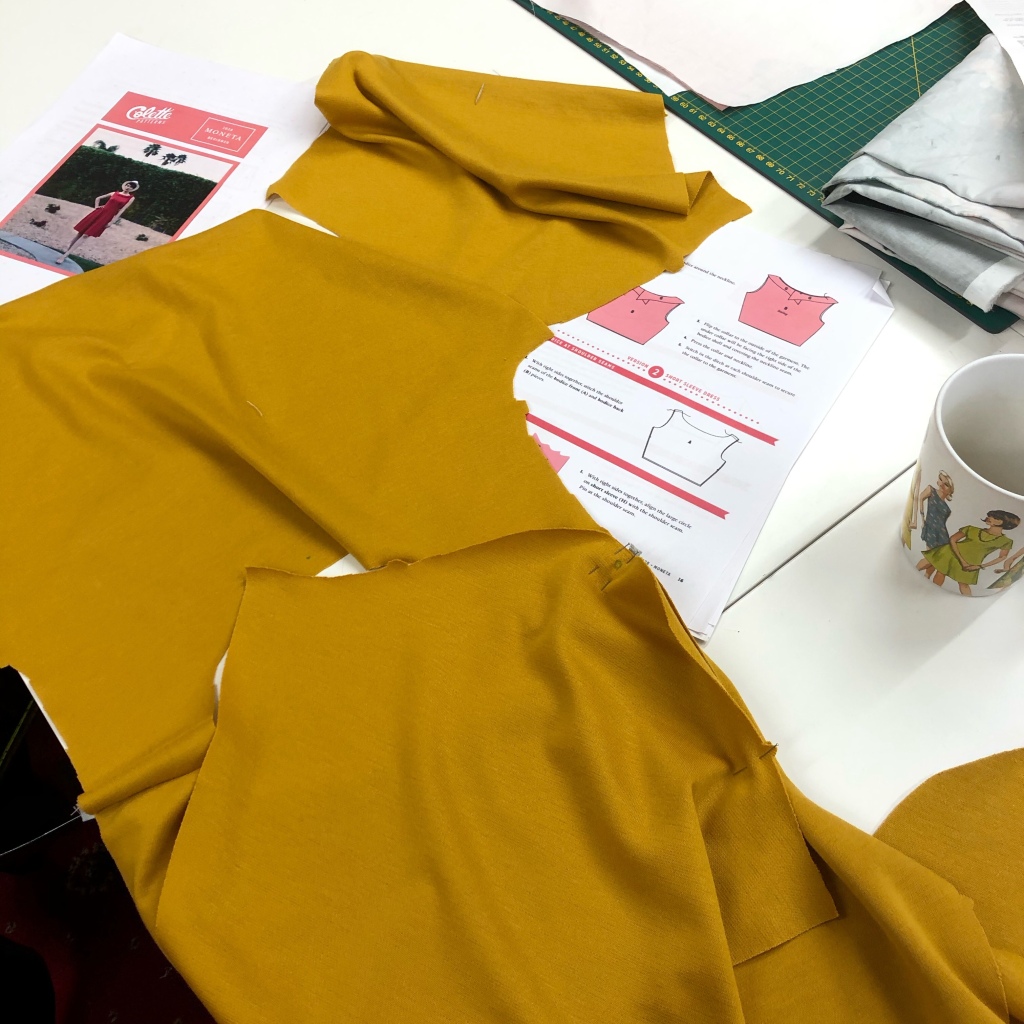
I bought the fabric to make my first Moneta dress, by Colette patterns, in the middle of last year, it’s been washed and ready to go for a while, however I had just started the Zadie dress, pieces are cut and stay stitching complete and I thought I should complete that first. However I was feeling overwhelmed by how many pieces there are to the Zadie dress that I thought starting something slightly simpler was a better way forward, and help build some much needed confidence.

Sewing Elastic into waist seam for the first time

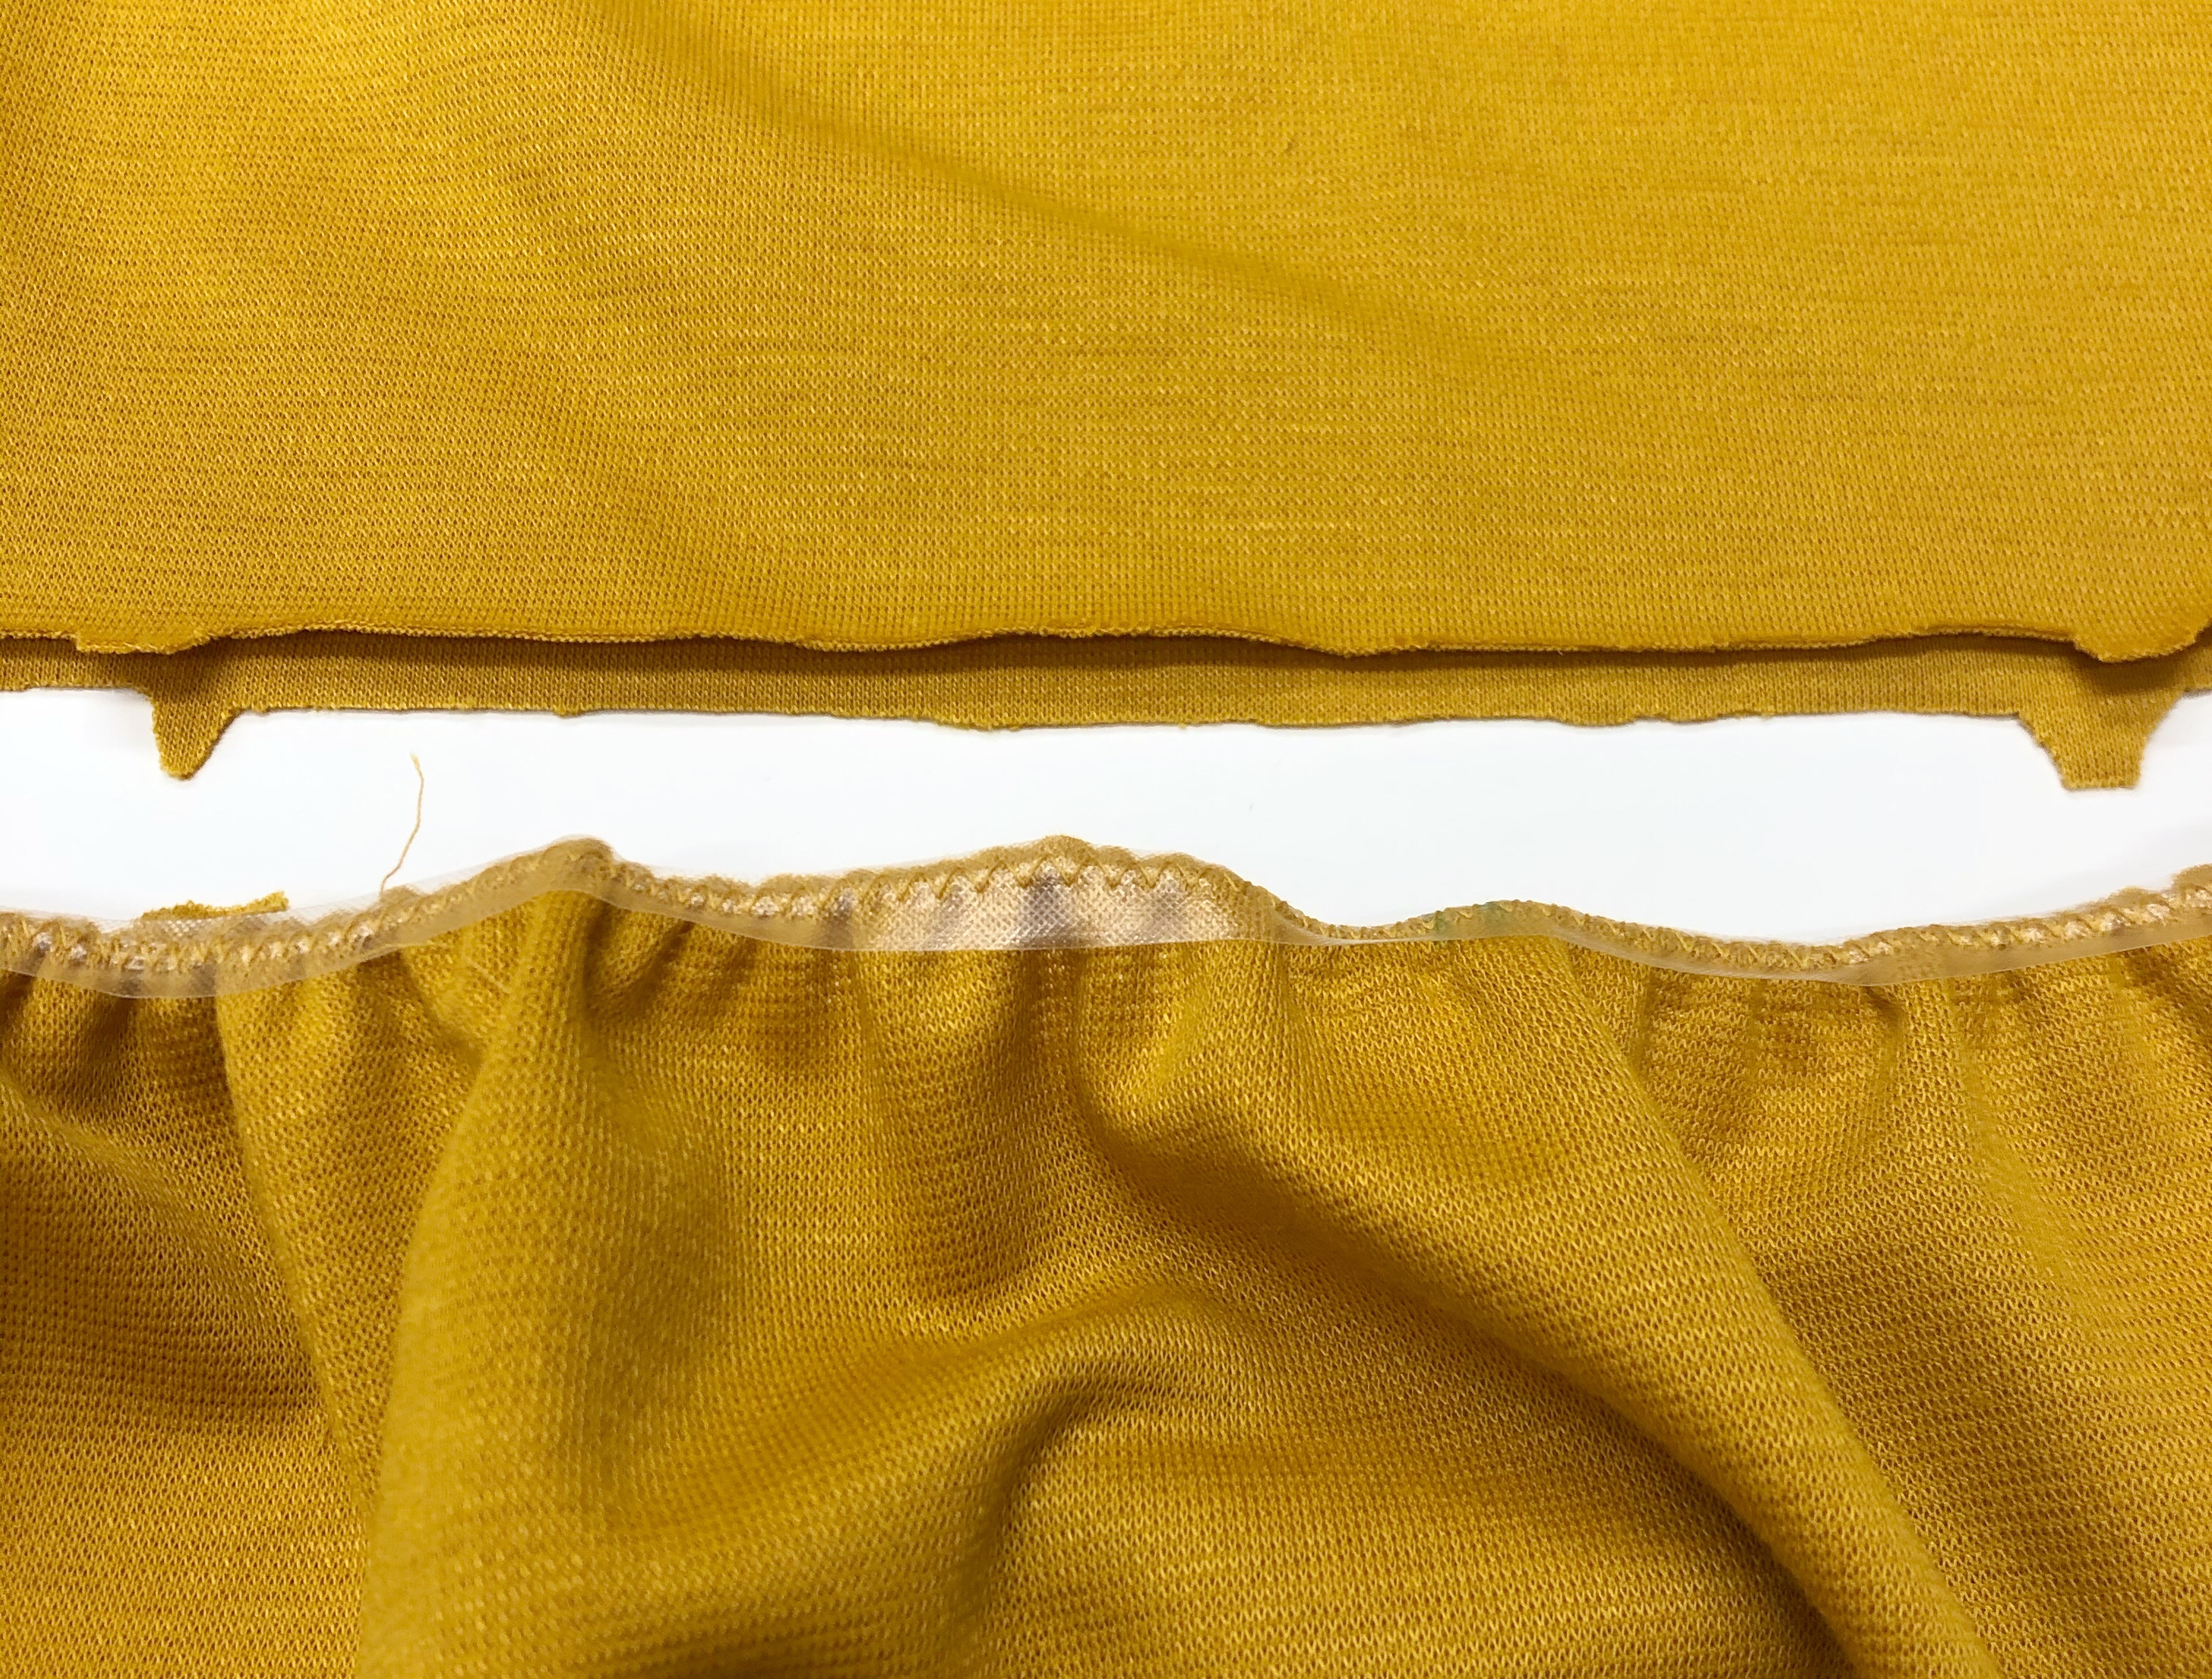
This project was probably one of the easiest I’ve done, in that I’ve already had a little experience working with knit fabrics so that wasn’t so daunting and even with a completely new technique involved; sewing in elastic, I had a wobbly start, but second time was a charm. I was excited rather than daunted by the task and really enjoyed it and because I was working with knit fabric I did not have the same sense of dread when it came to trying on the finished garment that I get with items made with woven fabric as I knew it’d be forgiving if the fit wasn’t quite right.

Me photographed in my garden wearing my finished Moneta dress

I was right not to worry about the fit; I have learnt to not only go by the sizing guide on the pattern but also measure the paper pieces and hold them up to my actual body to gauge the appropriate size. I usually have to take at least 2 cm out of the body length (short torso) which I did and I tapered the sizing out from the arm hole to the waist by one size (to accommodate narrow shoulders, small busy and wide hips). I didn’t do my usual tapering out to the next size on the hips as the skirt just flares out anyway. Having done that initial sizing work (and now getting into the habit of doing it) definitely saved me some heart ache and wasted fabric, unlike like many past projects (I’m still learning)!

My new overlocker

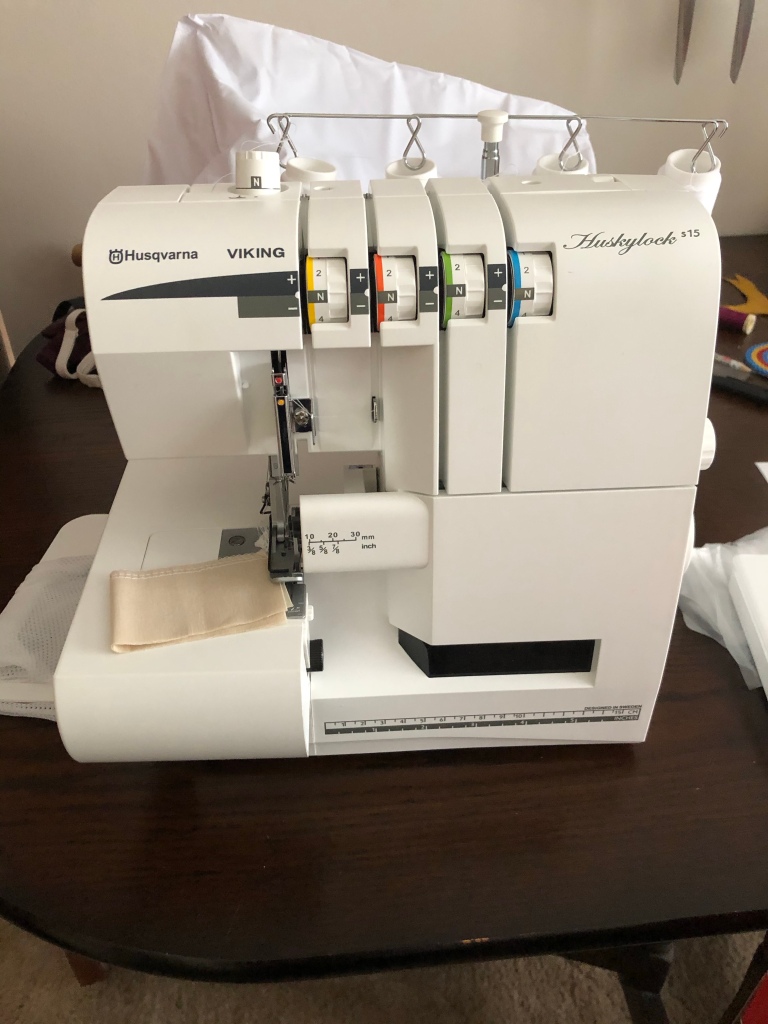
This project also proved to me that I could definitely make use of my own over locker. So I bought one!!! I was so excited buying it. I bought it from Coles sewing centre in Nottingham, on the last day of their February sale (just by coincidence) and you also get a free workshop included – a day of getting to know your over locker! I can’t wait! I shall still be visiting Sew at 174 for my cover stitching though – definitely can’t justify getting my own….yet!

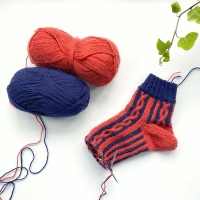
I used to be scared of working with jersey fabric and its unpredictable stretching and curling up, but now I’ve had several, slightly more involved, successful projects I will definitely be using it more, especially since it’s so wearable and fills some gaps in my wardrobe.

Thanks for reading, Steph

Morning Echo Cardigan

29 May

I finished knitting this cardigan some time ago (last November to be precise… just in time to wear to the first Nottingham yarn expo (which was rather lovely – I got to go with many of the Knit in Notts, knit group members, which for several of them, their first knitting show).

morning echo cardigan - photos - nettynot

I was missing a navy cardigan from my wardrobe after loosing one a while ago (I accidentally left it on the tram). I wanted something fairly simple but with a little interest so I could wear it with lots of different things and not get bored knitting it. After an advanced Rav search (v-neck, raglan sleeves, dk, 1 colour) I chose Morning Echo by sweet paprika designs. It’s lovely lace edge detail and v neck shaping was perfect for my criteria. Knitted from the bottom up in the round, it was a nice quick start to the pattern. However when I got to the sleeves I decided to veer off the pattern path.

morning echo cardigan - blocking - nettynot

I much prefer to knit most things in the round and in one piece, it makes it easier to try on as you knit and less sewing up, however the sleeves for morning echo are knitted flat and then sewn in. I decided to do a provisional cast on for each sleeve before starting the raglan shaping in the body so that I could knit the whole top of the cardigan in one piece. I worked out how many dec there would have been on the edges of each piece and spread incorporated that in my re-design of the top. I ended up adding a few more rows into sleeve tops, I think we’re supposed to me more stretched, but I don’t think my alterations were have turned out too badly and the cardigan fits well, I’m really not much of a fan of sewing up awkward seams.

morning echo cardigan flat - nettynot

Other adjustments I made were knitting the hips a size larger and then adding more decreases so that I ended up with the right number of stitches for the second size at the waist, this worked well and the cardigan flares out over my wider hips and I now have a cardigan that fits my shoulder, bust & hips all at the same time which it rather wonderful!

Shoulder morning echo - Nettynot

I really liked the way the edging was incorporated up the sides and around the next band, however I really don’t like vague instructions in patterns, to finish the neck band the pattern states to knit until “…reaches centre back of neck when stretched…” stretched a bit? Stretched a lot…I don’t know? I realise why it’s been written this way, it will be different for each size and possibly vary with neck sizes/shapes, but a little guidance at least would have been appreciated. I knitted, grafted, sewed into place then unpicked, ripped back a bit, re-graphed, re-sewed 3 times in total, it hibernated for a week or so too as I’d found it so frustrating. I knitted a size 2 at the top and made each side of the neck band 17.5cm before graphing together, in the end.

Despite my frustrations, I did finish it and had a lot of wear out of it and I’m sure I’ll get s lot more wear too.

morning echo cardigan - button band - nettynot

Yarn was Patons diploma gold dk originally bought from my lys Knit Nottingham, though it has since been discontinued by the the shop.

Nettynot in Morning Echo cardigan

I really need to work on my posing, I usually look too serious, but mostly too awkward (I’m always envious of instaesque photos people post of casually not looking at the camera, yet looking cool & perfectly showing off their handmade garment – I look so unnatural in my poses)!

More cardigan details on Ravelry (nettynot).

Thanks for reading

Steph

Patterns Everywhere : Barcelona part 3

5 Nov

Palau de la Música Catalana

We popped in to this wonderful building for a bite to eat and a drink and were so impressed by the entrance and small section we saw ,and I really wanted to see the stained glass ceiling in real life, that we booked a tour for the following day. I must admit I know very little about music halls and they’re not somewhere I’ve ever spend much time. However I do have an appreciation for amazing buildings and this really way spectacular.


CROSS pockets cardigan

9 Sep The beginning of Cross Pockets - Nettynot Blog

Well I had hoped to be writing a blog post about my wonderful and FINISHED cross pockets cardigan, but the fact is, it’s not going well! I’ve got really fed up about it too, I really want it to be finished, it feels like I’ve been knitting it for so long. My friends Knit In Notts seem to be finishing things left right and centre since I cast this on, including Jem’s lovely Kaneshon Cardigan by Sarah Hatton and Eleanor and Toni’s onesies (aren’t they great), to name a few.

Knit Nottingham 5th Birthday - Nettynot BlogI know I don’t spend as much time as the others knitting, and it’s not a healthy thing to compare yourself to others, but honestly I’m just feeling jealous and frustrated. I have not finished anything that I’ve started yet this year and we’re in to September and that makes me a little sad. I had a disaster earlier this year with my Bláithín cardigan, which ended up being frogged and is now currently hibernating! This was due to me having unintentionally knitted almost the entire thing on the wrong sized needles *hand smacks forehead*! I will complete this someday, but I’m not ready to tackle it again yet.

Blaithin so far - Nettynot BlogThe beginning of Cross Pockets - Nettynot BlogI had been making good progress with the my Cross Packets cardigan, it’s constructed very cleverly and I was really enjoying learning new techniques. As a lot of processes were new to me I have followed the 8 page instructions to the T. But after the long I cord cast off, I decided to sew the pockets in place before knitting the sleeves, I was a little dubious as the inside of the pocket really didn’t look like it would fit and it didn’t, even pinning into place and sewing the top edge didn’t help, as you can see here, it looks baggy and awkward.

Odd cross pockets - nettynot blogSo now I’m left knowing I’m going to have to do some ripping back, urgh. I think the problem is that the lovely basket weave stitch on the edge of the pocket is quite firm and structured where as the moss stitch inside of the pockets it quite loose and the two aren’t matching up, despite having the same number of rows.

Cross pockets i cord cast off - nettynot blogI think what I’ll end up doing is ripping back the cast off I cord, and the decorative edging, so that the pocket front and inside are separated again and continue knitting the pocket front until the length matches up and just ignore how many rows there are. This seems like the sensible thing to do right? I think I’m also going to change the I cord Cast off, I will experiment first, but it is very time consuming and curls up a lot – I don’t want anything to detract from the lovely edging. So maybe just a simple straight forward cast off could work.

I need to discipline myself to ensure I finish this project before I start my next, as I’m very keen to cast on my Puffin jumper, for which I’ve had the yarn for, for a year or so. I might do something a little bit mad and set myself the challenge of completing the puffin in a month, just get myself back on track (and happier – I’m always happy when I’m being productive).

I also booked myself on to a knitting a workshop with the lovely Eleanor while I was at Knit Nottingham’s 5th Birthday party, I will be learning to do Entrelac knitting – something new and exciting to look forward to!
I apologise that this is not the most positive or up beat post, however writing about my knitting frustrations has helped alleviate the disappointment as well as give me a little perspective to how to solve the issues. Hopefully my next knitting related blog post will be full of finished items and accomplishments.

If anyone has any helpful suggestions, please share them with me.
Thanks for reading!

A Shoal of Ganseys

15 Jun

After my boyfriend took a trip left to chance and ended up in Norfolk earlier this year, which you can read about it  on his blog here, if you like. While in Norfolk he visited a little Museum in Sheringham, called The Mo, he was so impressed with the museum he dedicated a whole blog post to it. In fact Martin liked the area as a whole so much that he decided he’d have another little holiday there and take me with him, which coincided with an exhibition of Ganseys at The MO!

knitted bunting at The Mo - nettynot blog

The Exhibition: A Shoal of Ganseys – The Knitting Legacy of the Fishing Community

Ganseys in Sheringham Museum - nettynot blog

I found the exhibition very interesting, the sheer volume of Ganseys on display was very impressive. I’m going to try not to ramble on about it too much, however there were several things that piqued my interest. I think everyone who’s interested should try and visit this exhibition, it’s definitely worth it.

Sheringham Gansey's, it was traditional to only have patterns on the yoke.

Sheringham Gansey’s, it was traditional to only have patterns on the yoke.

What struck me when having a closer look at the Ganseys, was the way they were made, having knitted a few garments in the round before I was surprised by the way they seemed to have been constructed. They were very boxy with very little shaping, which I can’t imagine would have made them overly comfortable. Then reading the information boards all became clear; they were made in a specific way, partly to make them easier to knit, but they were mainly designed to be very hard wearing. The body of the Ganseys were knitted on double pointed needles, often in the round, however I spotted a few with side seems, and then the arms were knitted from the body, with an added gusset at the arm pit to allow easy movement for the wearer. By knitting the arms from the top down it meant the cuffs could be ripped back and re-knitted when they were wearing out. All very practical and clever really.

All the Ganseys were nicely integrated into the Museums permanent life boat exhibits.

All the Ganseys were nicely integrated into the Museums permanent life boat exhibits.

There were a lot of superstitions around knitting Gansey’s. Green was not a good colour, the colour of land, supposedly meant you’d always be seeking solid ground. If a fisherman died before his Gansey was completed the knitter, usually their wife or family member, would not finish it as it would be bad luck to give it to another fisherman. Instead the yarn would be ripped out and balled up and left for a year. After a year, it would be re-used – wool was too expensive not to use.

I was surprised to read that many fishermen back in the day couldn’t swim and even more taken aback to read that they purposely didn’t teach their sons to swim, in the event they went overboard into the cold sea their deaths would be fast.

Ahoy there! Nettynot blog

Fishermen usually had a working Gansey and a Gansey for best, worn for Church and family weddings. I’m assuming the cream Ganseys in the exhibition were ‘best’ Ganseys as I can’t imagine they would have stayed that colour for long at sea.

Sunday Best Gansey - nettynot blog

I was interested to read that there aren’t many Ganseys left intact in the country, several of the Ganseys on display were recently knitted using original patterns. Yarn was expensive so Ganseys would have been regularly unravelled and re-knitted when they started to wear out, once the yarn was too worn out it would be used for blankets.

Herring girls - Photo from A Shoal of Ganseys Exhibition.

Herring girls – Photo from A Shoal of Ganseys Exhibition.

Herring girls – something I knew nothing about before attending this exhibit. Herring girls, travelled port to port, gutting and packing herring. During the day they had to wait hours for the boats to come in, they spent this time knitting! They had the opportunity to share ideas and many herring girls prided themselves on being the first to knit a pattern new to their area. Patterns were often recognisable to specific areas, however some patterns also symbolised life events, like zigzags for marriages.

Examples of the patterns used put in to a neat little index box.

Examples of the patterns used put in to a neat little index box.

A small display of knitted items inspired by ganseys .

A small display of knitted items inspired by ganseys .

I must admit I do find social history quite fascinating, so finding out about the lives of the fishermen and their families was as interesting as the actual Ganseys. If you ever find yourself in Norfolk, anywhere near Sheringham, I would highly recommend a visit to The Mo. Ganseys or no Ganseys it’s still a very interesting, albeit it small, museum. Find out more on their website.
www.sheringhammuseum.co.uk

Many thanks to go to the museum for allowing me to take photographs of the exhibition.

A creative jump start

24 Jul

Once a year I get roped into helping my Mum out with one of her many jobs/duties as the secretary of the Lunesdale Agricultural show, it’s usually a little frantic the day before and there’s lots of ticking things off long lists, the show itself is quite traditional and the actual day is quite fun with a great atmosphere with the odd person telling me ‘you must be Gill’s daughter & that they knew my Grandparents’ – it feels quite homely despite having never lived in the area myself.

Despite the slight bit of work involved with helping out, I do look forward to the show each year for a couple of reasons, firstly working in a city it’s delightful to escape for a few days to a place that is so far from my ‘Norm’, to a world where people are chatting about sheep passports, cattle and farming. And secondly the home industries show!

Some of last years winning items

Some of last years winning items

Every year since my Mum has been involved (I believe this is her 4th year) I have entered items into the homes industries show, usually bits and piece I’ve made throughout the year. Previously I’ve entered beadwork, a crochet rug, patchwork, felting and jewellery, on average maybe 4 or 5 pieces a year. Chatting to my Mum last weekend I suddenly felt all creative & determined, having had a little bit of a creative lull, mainly to do with the hot weather I think & the fact I’ve not being able to face tidying my craft room, so I pulled myself together, got tidying and started making lists & sketching ideas!

re-discovereed skirt to finish

I do find that tidying and having a sort out of stashed items can in itself lead to some great ideas as well as some great re-discoveries. For example I found a half finished skirt that I started making last year (but then the weather turned & so the skirt got put into hibernation, where I forgot all about it).
liberty print fabric strip

I also discovered the Kumihimo disk that I bought several months ago with the intention of having a play with braiding with different textured thread. So here came my first idea, and a perfect excuse to do what I intended to do in the first place. So I rummaged around to find some suitable fabric I could braid with and found an off cut of some thin Liberty print fabric I used for a previous project that was already in a thin strip (& also cut on the bias which makes life much easier). Using different materials I thought it best to stick to a simple pattern and one that I already knew that uses 8 threads.
Pink Kumihimo conbination
I created this pink and green braid first – picking out threads to match the colours in the fabric.
I liked how the braid turned out, I just wasn’t so sure about the colour, mainly as their not my usual cup of tea & the fabric was a little swallowed out in the overall design.pink kumihimo braiding

Version two I used a thicker strip of fabric and added in a few more beads and chose coloured I much preferred, mainly blue and turquoisy-greens.
blue kumihimo braiding
However once I’d done this braid I discovered I much preferred the original one, I liked the twisted effect it had and I decided it wasn’t the end of the world that you couldn’t see much of the fabric – the designs & colours worked well together & I may not wear it myself, but it will serve its purpose in the show and I will no doubt find someone to give it to.

If you’re interested in learning Kumihimo braiding there is a free sheet of downloadable instructions on The Bead Shop (Nottingham)’s website, where I also got the disk. There are loads of variations of kumihimo braiding on pinterest, once you’re set up with your disk & threads the braiding is quite therapeutic.

Although my blue deign didn’t work out as well as I anticipated, all it not lost. With some of the excess bits I cut off, I simply plaited together the left over fabric strip and 2 different ribbon pieces and finished them off with fold over ends and a clasp to create a simple & effective wrap around bracelet, I left the fabric ends attached, so I could tie them to disguise the clasp. It shows off the fabric and it’s perfect for summer.
Wrap bracelet clasp
Wrapped bracelet

I have loads more ideas up my sleeve for the home industries including this wire work necklace I created this week. Based on a workshop I teach at The Bead Shop, herringbone wire wrapping, I thought I’d play around with colour and created this bold necklace.
Herringbone wire wrapping

Look out for more posts about my entries.

Cute little Knits & a trip down memory lane!

14 Nov

Last Saturday night the lovely Jem Weston held a book launch for her first book published with Rowan. So as soon as I finished work I dashed across town to Tilt, a wonderful cocktail bar in Nottingham, to join in the celebrations. Tilt is the perfect venue for a party like this, the atmosphere was great & the settling perfect for all of Jem’s ‘cute little knits’ on show!

Collection Of Jem’s Cute Little Knits!

Close up of the knitted Hearts…trying to figure out which one I helped knit…

It has been an interesting journey to be a spectator, having shared some of the moments when Jem was excited about a new idea as well as a few frustrated when something hadn’t gone quite to plan, it’s so great to now see the finished printed book, it obviously it went down well, all 24 books brought along by Yarn sold in less than half an hour! I’m very impressed & proud of Jem & her achievement. I can’t wait for (hopefully) many more books!

Nottingham’s Knitting Celebrities. Jem Weston (left) & Eleanor Burke of Knit Nottingham (right)!

Close up of the Lovebirds Cushion

So after a not too late evening on Saturday, I was up at a reasonable hour Sunday morning, to head over to my Grandparents bungalow where I was meeting my parents & sister to retrieve valuable & sentimental items from their home before it is sold. Although we were supposed to be collecting up my Gran’s vast collections of handmade Embroidery and textile work (for which another blog will be dedicated to), we got massively side tracked by some fantastic photos we discovered, having never seen them before! I’m sure my little sister will not appreciate this, but I think she looks ever so sweet!

What a great combo – dresses & wellies! (I’m in the red ones)!

I love this! I think we thought we were very grown up with Gran’s hats & bags!
I love my sisters cheeky chops in this photo!


Art Of Inclusion

A Bristol project looking at how to make the arts more inclusive. Funded by Bristol City Council

Own Your Content

Own Your Content is a campaign from WordPress.com & CreativeMornings, encouraging creatives to own their content, platform, and the future of their work.

Create at Oakleigh

Our home renovation journey and all the creations made along the way. Lots of crochet projects and cakes and bakes from my kitchen.

CONTEMPORARY GEOMETRIC BEADWORK

an open source architectural beadwork project from Kate McKinnon and a worldwide team of innovators

Bead Mechanics

Geometric shapes made out of beads!

makeandfable.com/

Make & Fable creates fun and colourful macrame craft kits and patternse and host of creative workshops. Creativity you can wear, make and experience!

Knitigating Circumstances

Because knitting is excuse enough

Boys and Chicken's Sewing Adventure

Previously Boys and Chickens, I have created a new blog to share my sewing adventure as 2018 is they year I plan to teach myself to sew! There will also be bits of crochet and cooking too.

Clotho & Frigg

sewing and design studio

delightfultones

One girl's creative adventure.