Tag Archives: handmade

A Creative Funk – part 3

25 Sep

My final few unfinished projects… this is part 3/3. You can read part 1 here for some context and part 2 here for my other WIP’s.


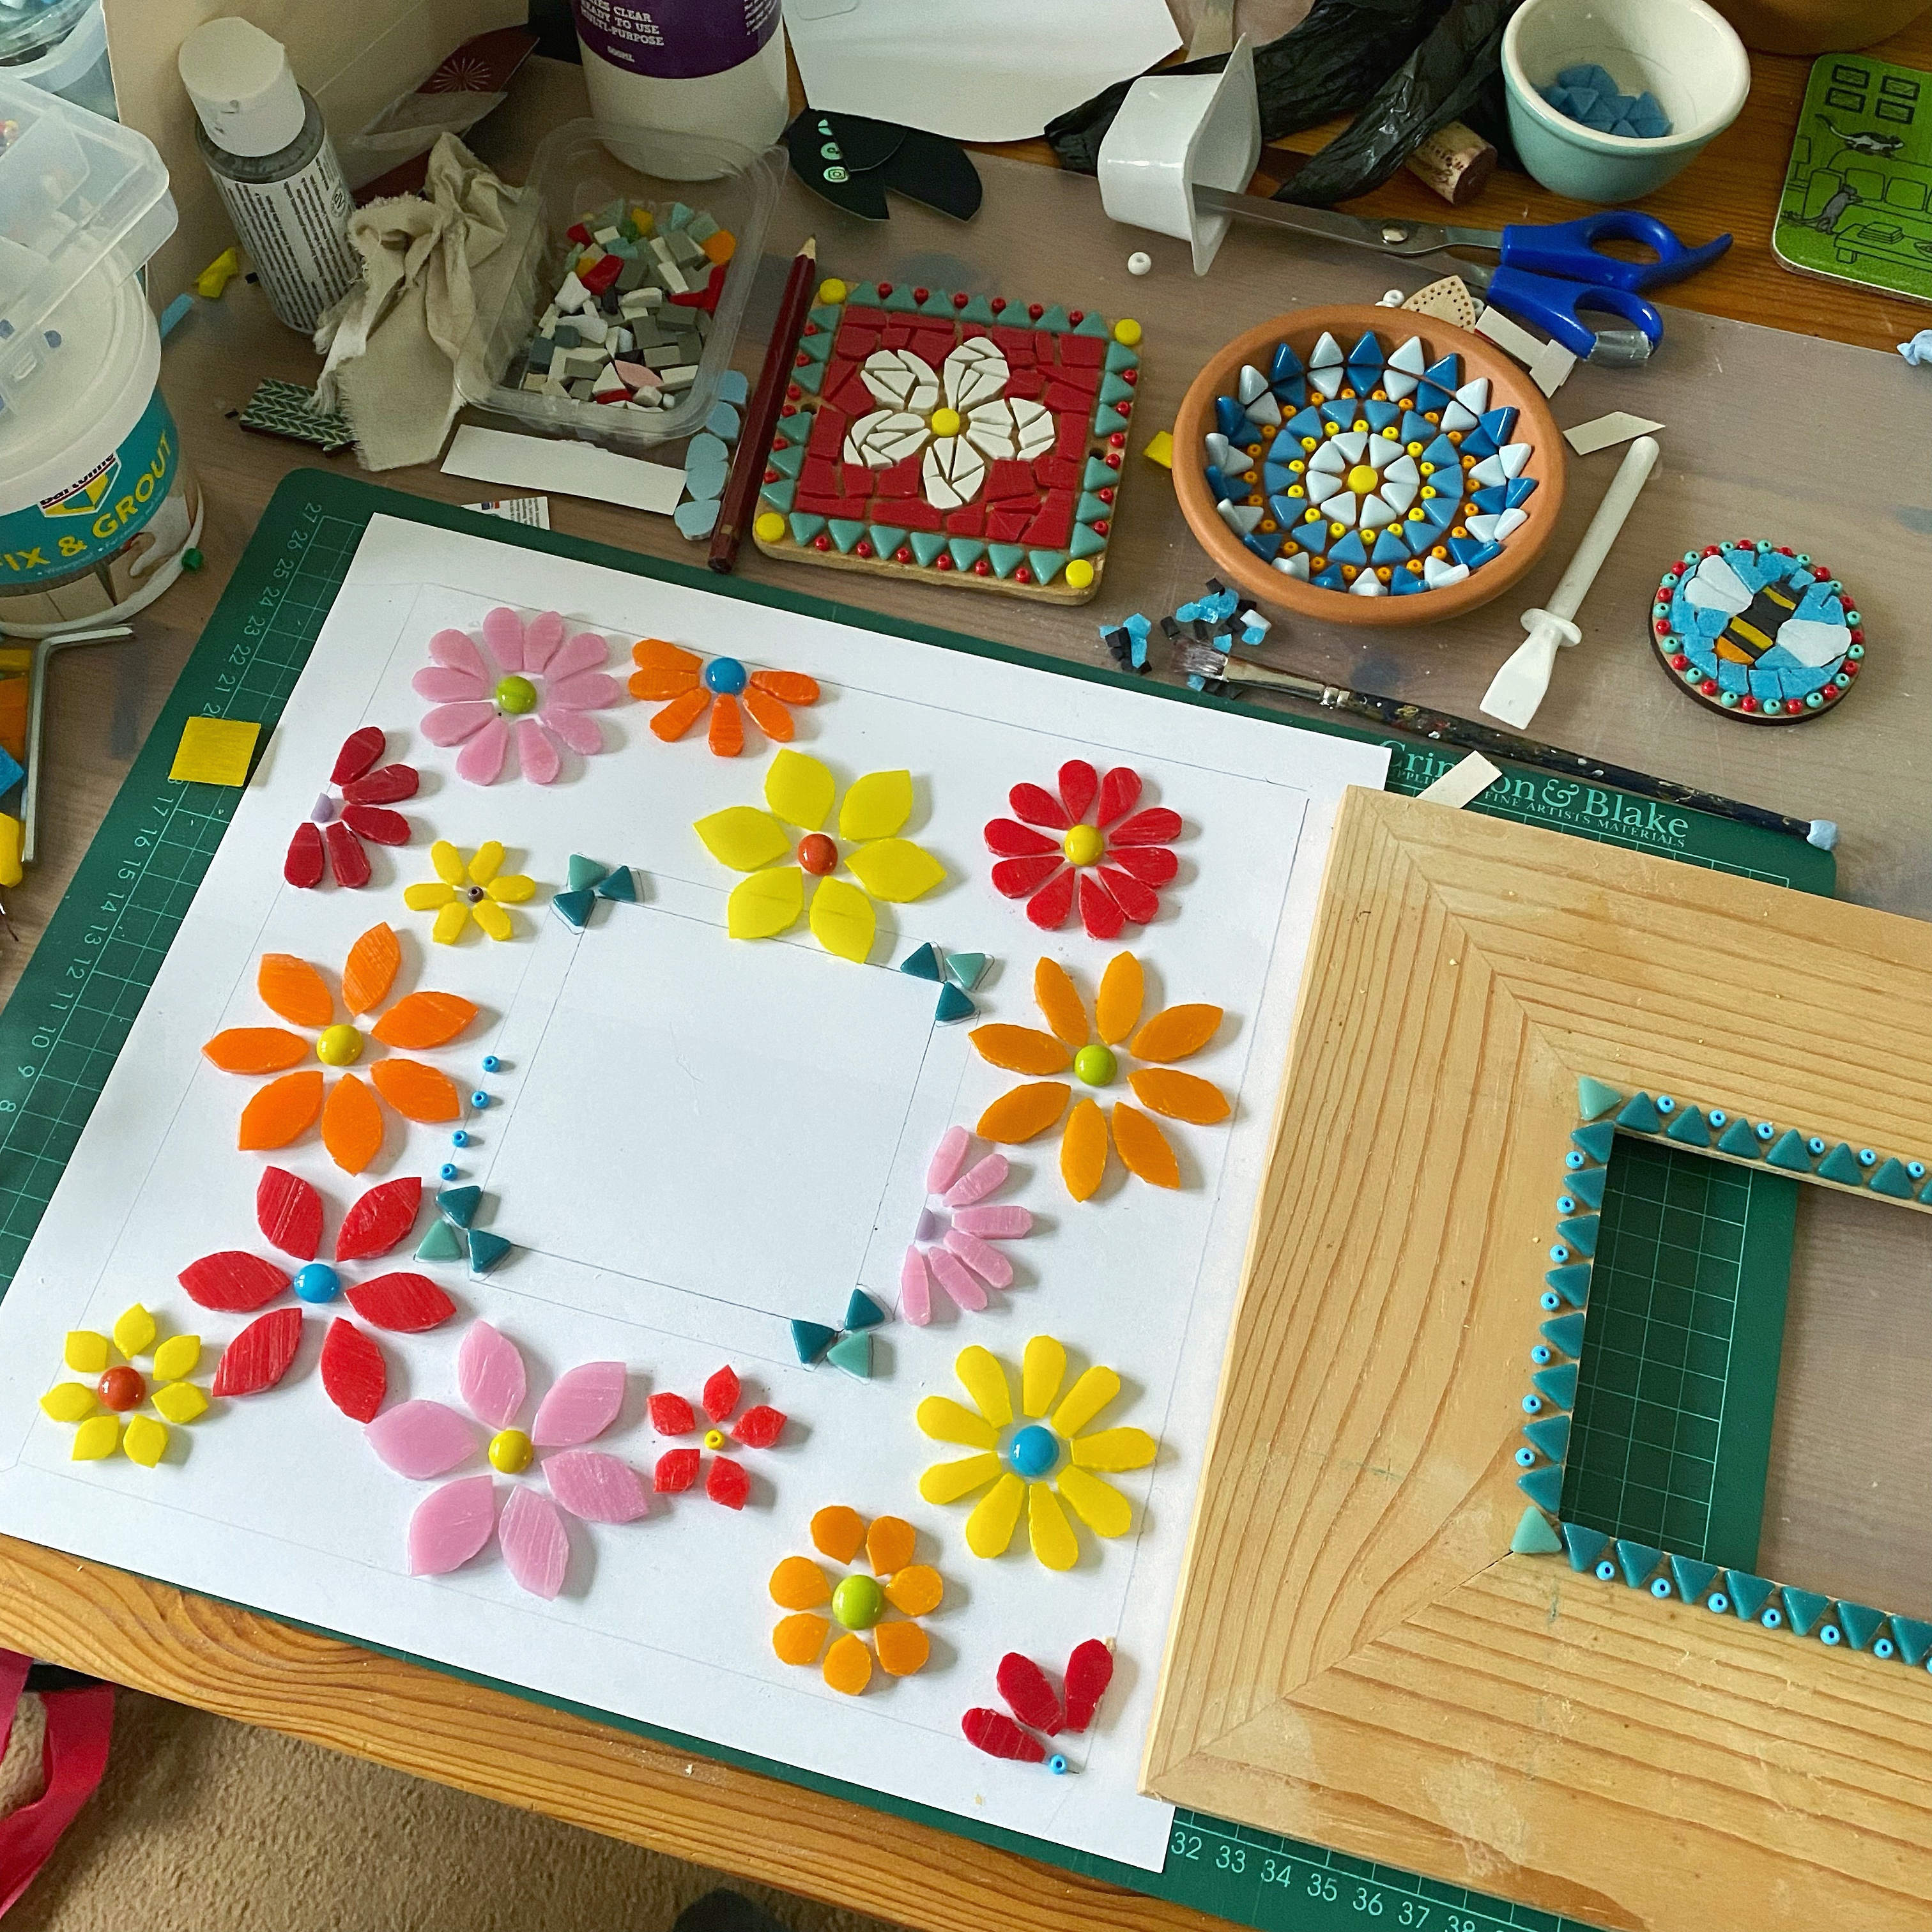
WIP 5 – Mosaic work. During the very hot weeks in July/August here in the UK I really struggled. The whole upstairs of my house were uncomfortably hot. So I avoided being up there, which is usually where I sew and I was too warm to knit and handle yarn. I was even too hot to sit on my sofa. The kitchen/dining area was the coolest place at 24C. So I decided to do something creative in there. So sat at my kitchen table I decorated a plant pot for my friend in mosaics. I really enjoyed it, so much so I planned out anther little project. Then another, as I started really enjoying it and loving the distraction from the heat. I left it all my materials and tools out so I could come back to it. Which I have done in fits and starts. I had a rare afternoon and evening with absolutely no plans or commitments a couple of weeks ago and spend the majority of this time working on a larger mosaic.

Since that burst of enthusiasm I’ve had very little time to continue and now it lays there taunting me, unfinished. In fact all 4 pieces I started after my initial plant pot are unfinished. My side-track into mosaics was very welcome at the time. Though I also feel it took me away from other things and now other things are taking me away from this. Maybe I have just taken on too many different things. I plan to transfer all my mosaic stuff into my small craft room, so it will not taunt me. I could schedule a day in the future to complete the pieces I’ve started. Maybe even setting aside 2-3 hours every other week to spend time on them, which should hopefully make good steady progress.

BUT first I’ll have to tidy my craft room. It’s only a small space (the box bedroom, with kitchen cupboard storage). It too often become the dumping area for all sorts of stuff. Cluttering it with more stuff, without tidying will be a distraction and I’ll not enjoy my time in there. This is a time and practicality issue. When I’ve needed to tidy this space before and it’s felt like a big mission, I set myself 10-15 mins a day to work on it, it usually kick starts the whole task and I just get on with it, or as least I make a little progress each day.

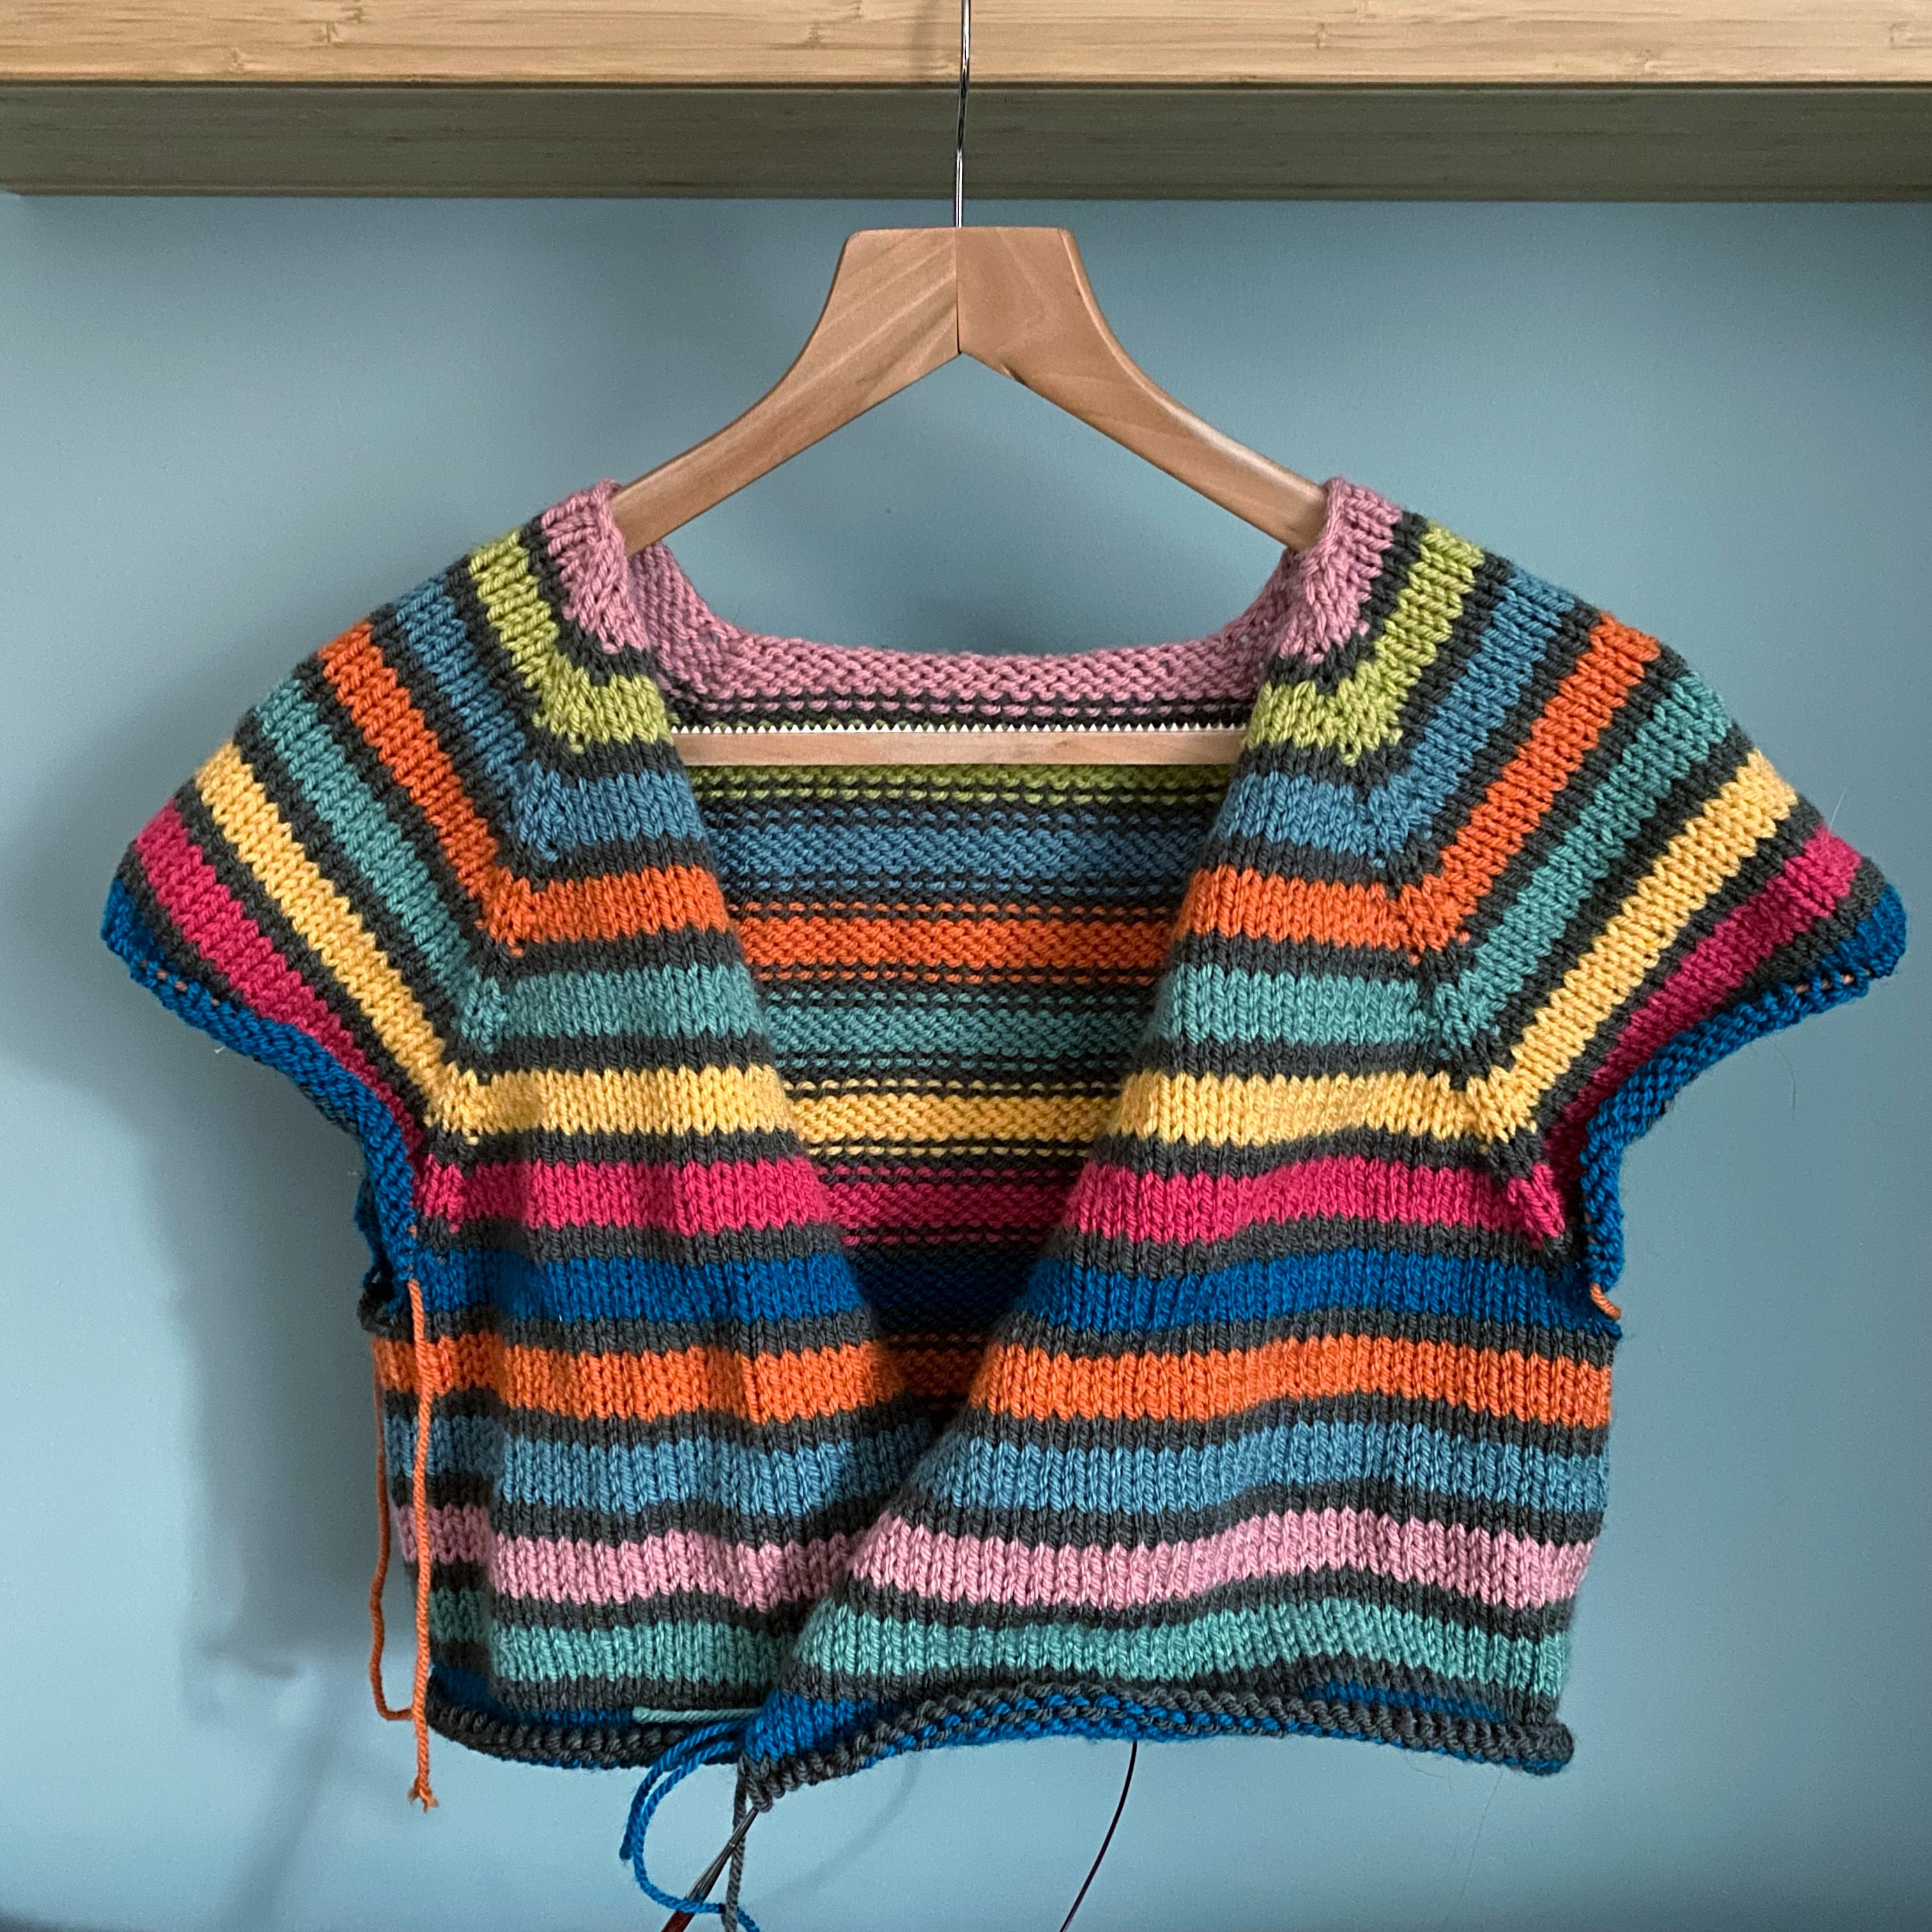
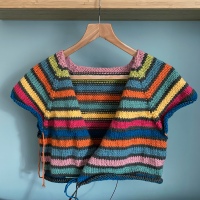
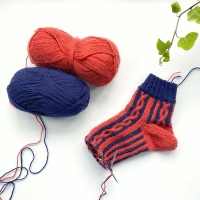
WIP 6 – Stripy winter cardigan – years and years ago I was given a bag of chunky soft but acrylic yarn. I’d thought I’d make a blanket out of it at some point, hadn’t happened. I had also been thinking about making some sort of cosy house coat/cardigan (I really wished I had one during lockdown winter 2020/21). I bit like a dressing gown but for everyday wear around the house. It can get draughty in my house and when I’m in on my own during the day I rarely put the heating on. I’m often in multiple layers, woolly socks, jumper, shawl and mitts. So I thought I could combine all these in one stash busting project. So decided to make a wrap over long cardigan, with a shawl collar, snug cuffs with thumb holes to keep my paws warms.

I was so excited to start this last winter though as spring approached, knowing it wouldn’t be worn until the following autumn, I just stopped knitting it. It somehow felt inappropriate to be working on it as the weather was warming up. However we’re now edging ever closer to chillier seasons and I’ll be wanting to wear it soon and I’m nowhere near finished, and I haven’t touched it since. This is also due to it being impractical to take to knit club, as it’s on the bulky side. With so many balls of yarn involved it would be a bit of a mission to take along each week. I may have to set myself a challenge of a certain number of stripes per week just to get me started again and I may find I just get back into it. The first super cold day will definitely give me a kick up the bum, but Ideally I hope to have it done by then.

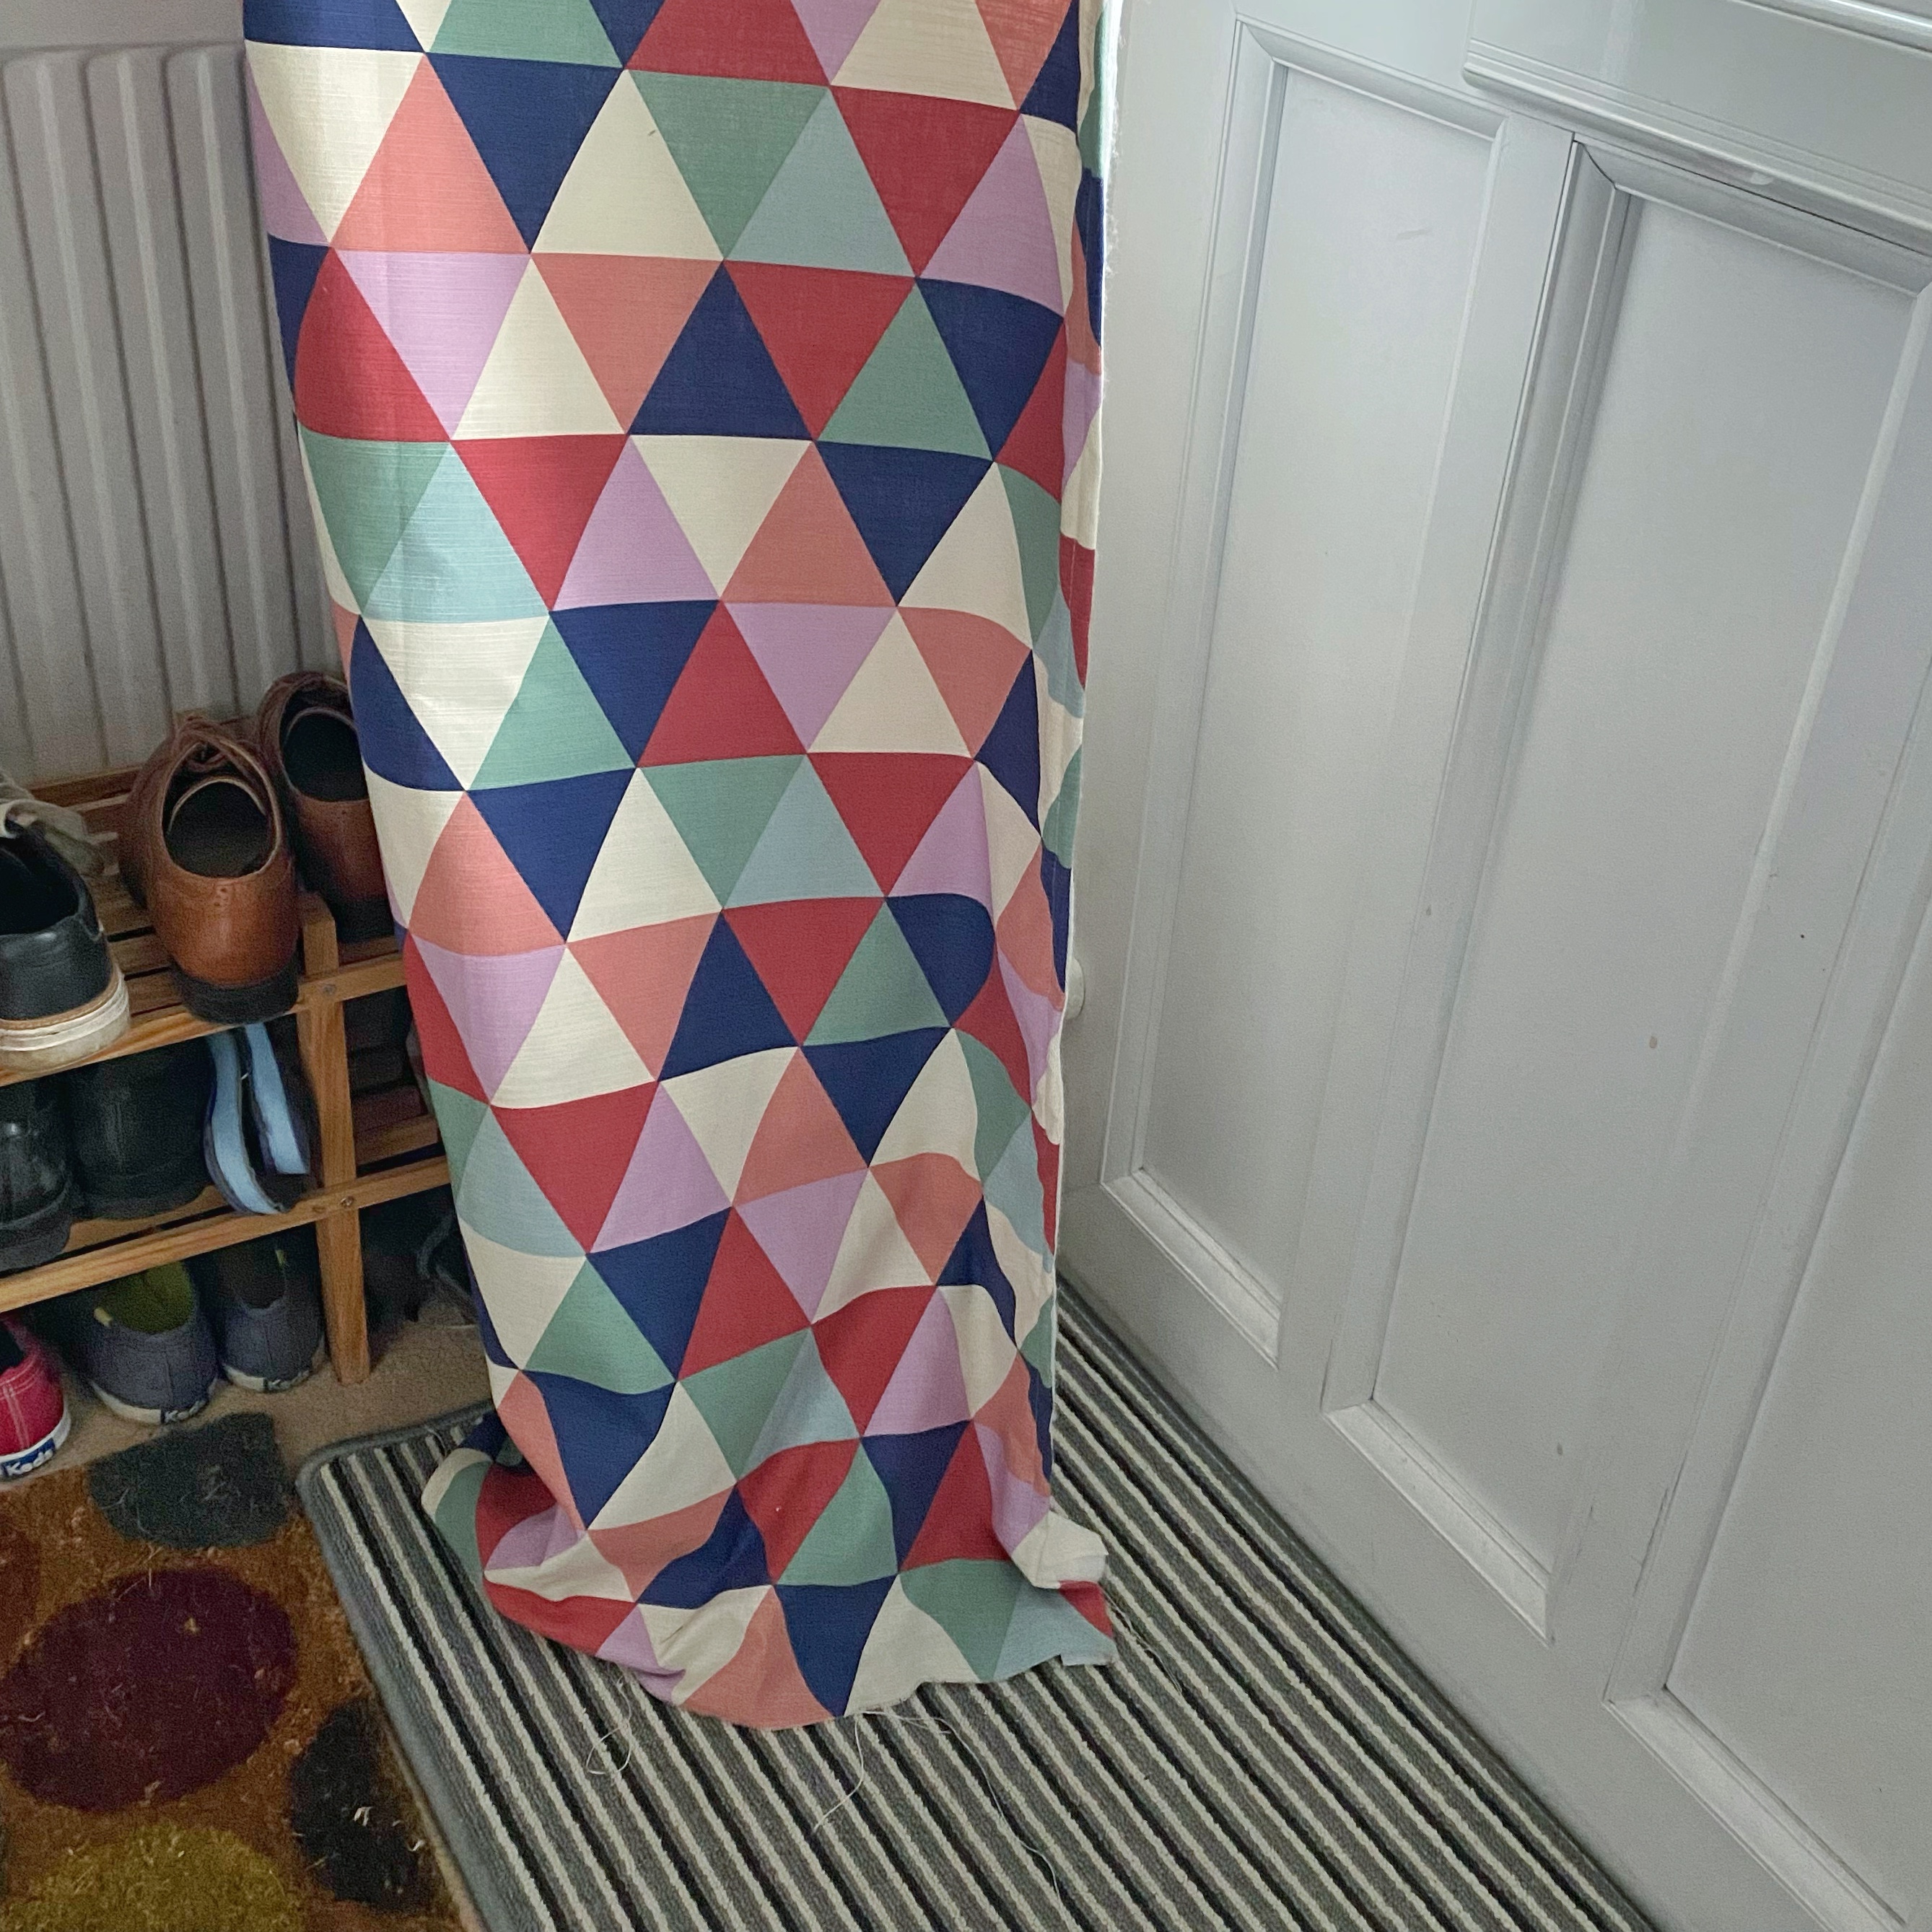
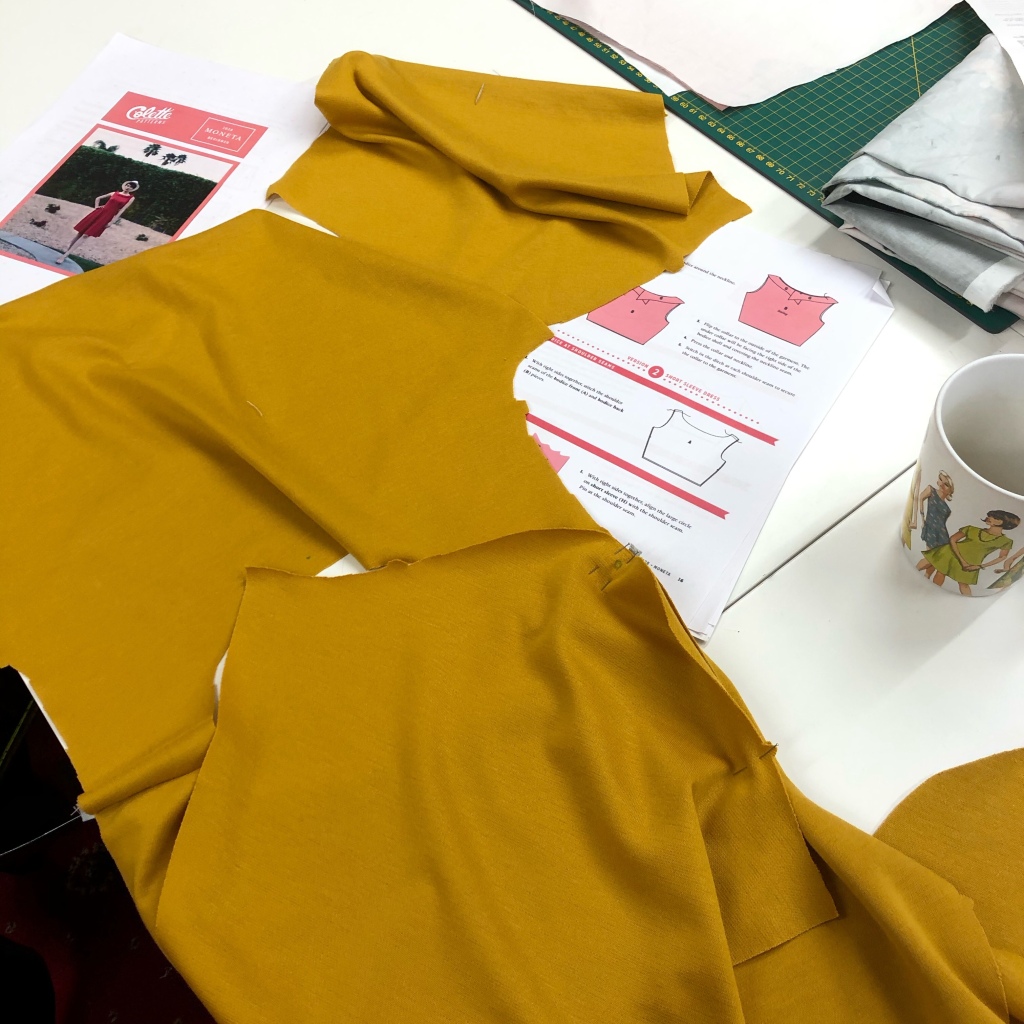
WIP 7 – Curtains – also one of my a Make Nine projects. This was my stroke of genius last year. My house can feel a little draughty in winter (as mentioned above). This seems to come from around my front door and despite closing the door to the lounge the cool air gets in. I’d entertained the idea of a draft excluder, but knew I’d find it annoying. So decided to make a thermally lined long curtain to keep the draft out and add some interest to my small hallway. It worked well (it worked well during the heat wave to keep the sun heat out too). However I hung the curtain without finishing then hem, so it could settle into place and I could figure out the correct length…. 7 months later it’s still unfinished. I also bought enough fabric to make matching curtains for the top of the stairs. Which I’ve not done either. Hemming the door curtain is just sheer laziness. I should just get on with it.

The curtains at the top of the stairs are a little different. I need to decide how I’m lining them. I had a random amount of thermal lining left (as you had to buy whole meters) but it didn’t occur to me at the time to thermally line the other set too. So I have been pondering since February whether to buy more thermal lining (to make the most of what I have left) or buy standard lining which will be easier. It’s silly really it’s just decision paralysis on something that shouldn’t require this much thought. However the with colder weather coming, it should make me get on with it. Also thermally lined curtain on in the draughtiest area should really be a no brainer especially with the rising cost of energy bills, so I’ll have to figure out how much more I need (and hope it’s in whole meters).

Reflection on my creative funk

This isn’t by any means ALL my unfinished projects, but all 7 are things I’ve started recently with good intentions, then just stopped and struggled to get motivated as I mentioned in part 1. However, although this rambly writing has felt a little self-indulgent and possibly no one cares, it has helped me get a few things in order in my mind, and I realised a few things too.

Recently when I’ve felt “not bothered” to work on a project I had in mind for that day, I think what I’ve actually been doing is giving myself a break. All too often in the past I have worked hard to meet self-imposed deadlines, to the point I’ve not enjoyed the process as much, or stayed up late or rushed. At the time it feels a little defeatist, when I’ve made time for something and then not done it. I think I need to be kinder to myself and “strike when the Iron is hot” so to speak. Work on project when I want to and not force it. This is perhaps a bit of a new concept for me. Crafting and in particular knitting has always been what’s got me through difficult times and relaxes me when I’m anxious, it’s comforting. So not wanting to do it when I was feeling down was actually quite disconcerting, but maybe I was subconsciously making things easier for myself….

I’m posting the state of all my WIP’s on Instagram and will update my progress there too.

Thanks for reading
Steph Xx

Moneta Dress & Sewing Confidence

16 Mar

I wrote the following blog post back in March, just before full on lockdown. It seemed so trivial at the time to post it… so it’s sat in my drafts until now. I’m on holiday, it’s peeing down outside & I’m feeling a little reflective of what I’ve achieved over the year project wise & how lockdown has effected my creativity (I’ll probably write another post about that). I wore my Moneta dress for the first time today, now the weather has turned, so it seemed appropriate to share my post now.

I’ve finished the first of my Make 9 projects for 2020 (beginning of March). Definitely off to a slow start, given we’re almost a quarter of the way through the year, however I’m still feeling confident. I have many of the projects in progress so maybe, just maybe I’ll get some complete by the end of the year!

Starting my Moneta Dress


I bought the fabric to make my first Moneta dress, by Colette patterns, in the middle of last year, it’s been washed and ready to go for a while, however I had just started the Zadie dress, pieces are cut and stay stitching complete and I thought I should complete that first. However I was feeling overwhelmed by how many pieces there are to the Zadie dress that I thought starting something slightly simpler was a better way forward, and help build some much needed confidence.

Sewing Elastic into waist seam for the first time

This project was probably one of the easiest I’ve done, in that I’ve already had a little experience working with knit fabrics so that wasn’t so daunting and even with a completely new technique involved; sewing in elastic, I had a wobbly start, but second time was a charm. I was excited rather than daunted by the task and really enjoyed it and because I was working with knit fabric I did not have the same sense of dread when it came to trying on the finished garment that I get with items made with woven fabric as I knew it’d be forgiving if the fit wasn’t quite right.

Me photographed in my garden wearing my finished Moneta dress

I was right not to worry about the fit; I have learnt to not only go by the sizing guide on the pattern but also measure the paper pieces and hold them up to my actual body to gauge the appropriate size. I usually have to take at least 2 cm out of the body length (short torso) which I did and I tapered the sizing out from the arm hole to the waist by one size (to accommodate narrow shoulders, small busy and wide hips). I didn’t do my usual tapering out to the next size on the hips as the skirt just flares out anyway. Having done that initial sizing work (and now getting into the habit of doing it) definitely saved me some heart ache and wasted fabric, unlike like many past projects (I’m still learning)!

My new overlocker

This project also proved to me that I could definitely make use of my own over locker. So I bought one!!! I was so excited buying it. I bought it from Coles sewing centre in Nottingham, on the last day of their February sale (just by coincidence) and you also get a free workshop included – a day of getting to know your over locker! I can’t wait! I shall still be visiting Sew at 174 for my cover stitching though – definitely can’t justify getting my own….yet!

I used to be scared of working with jersey fabric and its unpredictable stretching and curling up, but now I’ve had several, slightly more involved, successful projects I will definitely be using it more, especially since it’s so wearable and fills some gaps in my wardrobe.

Thanks for reading, Steph

Simple Knitting as an effective break

5 Feb Textures of Be Simple Shawl using hand dyed yarn

Sometimes simple is what I want, especially after a long, fiddling or slightly frustrating knit. I chose to knit the Be Simple shawl after I’d completed my Puffin Jumper. It hadn’t been difficult as such but there was a bit of faffing regards lengthening the sleeves at the end, which you can read about in a previous post.

Yarn dyed by Knit Nottingham

I also needed something that I could keep knitting until I ran out of yarn, as the lovely Eleanor of Knit Nottingham gifted me one of her first batch of hand dyed yarns, it was a 4ply (Cotton/wool blend, we think, neither of us could quite remember after the fact), but that didn’t matter, Eleanor had used colours she thought I’d like & it had turned out wonderfully!

Textures of Be Simple Shawl using hand dyed yarn

A mixture of grey turquoise and blue, it knitted up nicely with colours pooling and striping, I’m curious as to how the yarn would have worked in a pair of socks, though at the time I was not back into knitting socks. The shawl was a simple and enjoyable knit and I love the end result. for some time I had felt each new knitting project I selected had to be more complex and intricate from my previous one to challenge myself and improve and learn. I still like to challenge myself, but I also like to relax and just knit something from time to time, and that’s ok!

Be Simple Shawl knitted by Nettynot

Still looking and feeling a bit awkward in photos – at least a shawl is easy to model 😛 

I’d finished my be simple scarf/shawl at the wrong time of year, just as it was nicely warming before summer, so it got put away ready for Autumn, which actually is lovely to do, it’s like a little gift to your future self. It turned out to be the perfect indoor scarf to wear at work which can be rather chilly being in a beautiful Victorian building.

be simple shawl- knitting - nettynot creates

I wouldn’t hesitate to knit another simple shawl for a relaxing project and I’d definitely knit more of Eleanor’s yarn, I’ll just have to be fast, she usually just dyes yarn for special shop events and if you’re not there when doors open you might miss out!

(Since writing this I have started knitting sock again and managed to buy more of Eleanor’s yarn at the shop Birthday event)!

Lovely new Yarn from Knit Nottingham - Nettynot Blog

Thanks for reading!

Steph

Patchwork Cushion

9 Aug

I have written a whole blog post about the chair I made this cushion (it was a slight tangent, but a lovely nostalgic one for me). However my original intention was to write about the cushion. I have made many things over the years and not documented them, I used to be able to remember the majority, however I find I stumble across old photos and think, oh I’d forgotten all about that skirt/bag/jumper I’d made. So I’m making a more concerted effort to document things, which Instagram has made easier to do, but I also like to use my blog as a notebook to myself as to the challenges/issues I encounter and had to resolve along the way. That said, although I do plan most of my project, at least to begin with, there is a considerable degree of  let’s just give it ago and see what happens.

I love a bit of Patchwork, and although it’s time consuming I do really like English paper piecing, which I hadn’t done for while after finishing the mammoth task of my Mum’s quilt. However I thought this would be a little project. I sketched a few ideas quite small to begin with and once I found an idea I was happy with I enlarged it and drew it out on some wall paper lining. I quite enjoy the Maths involved with patterns and pieces, I probably enjoyed this process as much as the actual making.

Paper piece template cushion - Nettynot Blog

Once I had my piece draw, in theory all the same shapes should be the same size, so it shouldn’t matter which pieces I sew together along as they are the right pieces, however learning from previous mistake I knew I really needed to be putting the pieces back together in exactly the way I cut them up, as it only takes a few of them to be a millimeter or so out to make it really awkward sewing them together later on (& I’m only human after all). So I numbered each piece and took a photo on my phone, for reference, before cutting up the template.

I often struggle to find enough time to get stuck into a project like this in one big chunk, so I decided I’d try to do the tacking and sewing of 1 set of shapes each evening for a week, so that it didn’t feel like it took too long to complete.

English Paper Piece - round Cushion cover - nettynot blog

It took me longer to decide what to do with back and get my act together to complete it. That didn’t go quite to plan, but I made it work in the end (sort of). I think the errors here were not measuring and cutting properly. I sewed strips of fabric together and made a cardboard template for the triangular shape, which really isn’t accurate enough when using a rotary cutter  (lesson learnt).

Cushion Back - Nettynot blog

The seams didn’t match up on the back terribly well, so I unpicks a couple of seams and tweaked it enough that it doesn’t stand out like a sore thumb, but in the process it had the central two hexigans wonky, I would have prefer them to be symmetrical as intended however it’s not too bad and everyone (hopefully) will be looking at the front and not the back. That said I did get the invisible zip in evenly, though not so invisible with the fabric stretched slightly.

Cushion Back with zip - Nettynot blog

I do like the finished result, and it is the bold eye catching design I had in mind, influenced slightly by the leather 70’s pouffes seen in many retro and vintage shops. However if I was going make one again I would make the cover larger, whenever I make a square cushion cover I make it slightly smaller as it makes for a better plump finish, no one wants floppy cushion, I applied the same principal here, wrongly as I think it looks a little too tight and puckered at the edge. I think even just an extra half inch all round would have made a nicer fit.


I also might try to be clever next time and make a convex shaped cover to eliminate the puckering on the back…..hmmmm the cogs are whirring on that one already.

Thanks for reading.
Steph

New Year & Hedgehog Mitts

26 Jan

I haven’t blogged for a while, however I’m not feeling guilty about it or beating myself up for not keeping up with my ideal 1 blog post a month. I have been busy crafting; knitting, needle felting, sewing and much more. I have just been spending more time doing than documenting/reflecting in blog posts. I have been  posting the occasional Instagram WIP photos when I’m busy making and doing, still acts as a good reminder as what I’ve accomplished. That said there are finished project I do really want to share and I do still an enjoy blogging.

collage-of-recent-makes-nettynot-blog
I got quite a bit of knitting done in 2016 (unlike 2015 which I wrote about here). I have had a different approach to knitting this year. I’ve only had one larger project on the go at a time, and knitted several smaller things in between and along side. Sometimes for practical reasons, like not wanted to take a whole garment to knit club or just getting inspired by something.

stranded-knits-by-ann-kingstone-nettynot-blog

I started my hedgehog mitts after a spark of inspiration having treated myself to Ann Kingstone’s “Stranded Knits” book at Yarndale back in September. I fell in love with the Hedgerow Cardigan when saw the book at the first Yarndale but thought I’d never get around to knitting something that complicated, but I’m started to think it’s achievable (eek) it is stunning (though it  might end up being a 2018 project – once I’ve collected another yarn – so many colours) – isn’t it beautiful?!

 
stranded-knits-hedgerow-cardigan-nettynot-blog

But for now, needing new mitts and loving the fairisle Pleiades Mitts in stranded knits, I thought knit them as a good pause mid Puffin Sweater, however I decided to change the motif slightly.

pleiades-mitts-nettynot-blog

Taking the same hedgehogs design from my adapted paper dolls jumper and playing with different stripes. I also managed to knit these mitts using yarn entirely from my stash – always a bonus, and then I can feel less guilty for buying more yarn!

hedgehog-planning-nettynot-blog

hedgehog-mitts-nettynot-blog

I completed these back in October and I have been wearing them loads, which you can tell from the slight pilling that’s already occurred – ah well, you can be too precious about these things – they are very woolly & warm and there’s not much point in knotting things you aren’t going to wear.

hedgehog-mitt-details-nettynot-blog

Green Vianne Cardigan

7 Sep

Roughly a year ago I was writing a blog about how frustrated I was about having not completed a knitted garment yet in 2015. How times have changed! After already finishing Blaithin & cross pockets  (admittedly both started last year) I have just finished my Vianne cardigan and have made a good start on my Puffin jumper, I really am on a roll! I’m so pleased with myself (sorry for the smugness), I hope the productivity lasts.

vianne-cardigan-nettynot-blog

The Vianne Cardigan by Untangling knots. In a lovely bright green (yarn details on my ravelry page) it’s another shorter cardigan by the same designer as the Miette cardigan I knitted at the end of last year, so I’m hoping it will also go well with plenty of my dresses. It is a brighter colour than I usually go for, however I am planning to make a simple denim dress that will allow me to wear my brighter coloured knits and not detract from them. (Thanks to Knit Nottingham for my yarn based back drop).

eyelet-details-vianne-cardigan-nettynot-blog

I loved the shape of this cardigan and I was intrigued by the sleeve construction as I’ve never done knitted a sleeve cap before, however due to do another sooner having bought Kate Davies Deco pattern at Edin Yarn Fest earlier this year), but it was fairly straight forward and it all knitted up very quickly. One aspect I wasn’t so keen on was the lacy back. I plan on wearing it in the winter (knitted in 100% wool) so I didn’t really want a chilly back and for this same reason I also knitted full length sleeves. I found  a very useful blog (via ravelry) by, By Gum By Golly, who’d also decided to have a solid back.  She compensated for this by knitting the back in a larger size and I followed her lead.

vianne-cardigan-back-nettynot-blog

I knitted this cardigan in about 2 months, which is pretty good for me, though definitely helped by being knitted on 5mm needles in dk weight yarn, however I did discover that I should really have washed and blocked my tension square as the cardigan has grown a bit once I blocked it, not to an unwearable extent, however the fit isn’t perfect.

vianne-cardigan-arm-hole-nettynot-blog

The arm holes are a little long which seems to have created extra fabric making that cardigan little a little batwingy, though it seems much worse to me than the photos show, so I might just be being a little pernickety (though aren’t we all when we spend so much time working on a project). The sleeves are also a little long, but being knitted from the top down I could rip them back, however they work well with the cuff just folded back (having been knitted in the round) and I’ll probably appreciate the extra length to keep my hands warm in the winter.

vianne-cardigan-fit-nettynot-blog

I’m trying very hard not to buy any new (old) buttons, though I can’t help myself when I see a button tin in a charity shop or vintage fair, however I ONLY buy sets these days and try not to buy brand new buttons when I have so many! I had initially thought I’d go for a contrast and add navy buttons, but as soon as I saw these in my collection I knew they were destined for the Vianne; I love a rounded button with a shank and they match so well.

puffin jump wip - Nettynot Blog.jpg

I have defiantly found my knitting momentum is improved when I alternate slow and fast projects. I have already re-picked up my Puffin Jumper that I cast on, and knitted a few inches of, on the train to and from Edin Yarn Fest back in March and the body is almost complete now, though I’m getting a sense this project will me on the needles for some time the sleeves are next I’m already dreading them – sleeves always seem to take forever, particularly in 4ply on 3mm needles – wish me luck!

Thanks for reading!

Me Made May 2016

30 Apr

In May 2014 I was in awe of all the wonderful Me Made May photos popping up on Instagram, at the time I was very much of the opinion of “wow, I’d love to do that… but I don’t have enough handmade items, or the time to do it!” Then May 2015 came round and I there were lots more lovely handmade and inspiring outfits cropping up. However last year I thought, this time next year, maybe I’d join in…!

The knitters and sewers at Knit In Notts have spoken about it a few times with no real commitment being stated so when I saw that Jem Weston had shared her pledge on Instagram (@jemweston) last week it gave me the kick up the bum to also join in!

This is my pledge – stated over on  “So Zo…What do you know?” blog (the creator of the MMM challenge).

 ‘I, Steph Gibbs (nettynot.wordpress.com @nettynot on Instagram), sign up as a participant of Me-Made-May ’16. I endeavour to wear a handmade garment, each day for the duration of May 2016, as well as finish some UFO’s!’

MMM16

I feel I need to remind myself that a challenge, which Me Made May is, should test me, if it’s too easy it’s not a challenge. I do not own enough items to wear a different handmade item every day, however I’m already looking forward to being more creative with my outfits. I intend to include garments that I’ve customised in some way too, as that’s always a useful skill and a nice way to rescue clothing or make then your own. I also hope that this challenge will make me more productive and think about how I’m using my time in the evenings, so I can be more efficient and finish some UFO’s.

I’m going to address a few different areas of my handmade wardrobe for this challenge….

Sewing – I’m going to look at all the handmade garments in my wardrobe, mostly skirts, that just require slight adjustments to make them wearable again.

Knitting – I’m going to wear more of my hand knitted garments, I have several that I don’t make the most of, which is madness when I think about the amount of time spent making them.

Jewellery – Almost all of my jewellery I have made myself (occupational hazard) and have so many necklaces and bracelets, yet I always wear the same few on rotation. So I’m going to wear more of the vast array I have (& maybe cull the items that I’m not going to wear again – it is the right time for a Spring clean after all).

There’s a few specific things that I’d like to do during May and this challenge (I am aware I’m being a little ambitious, but if I commit them to computer screen, they’re more likely to get done) and it’s not as though once May is over I’m not allowed to keep challenging myself, right?!

Mimi
I have already cut out all the pattern pieces (about 6 months ago) to make the Mimi blouse from Tilly and the Buttons – Love at first stitch book, I have suitable fabric that already washed n ready to go. I intend to complete this by the end of May!

Cross Pockets
I have brought the problematic Cross Pockets Cardigan out of hibernation and ripped it back to the waist ready to re-knit and hopefully fix the issues I had – I want to complete this by the end of May too!

Mini blouse fabric - Nettynot Blog

Coco
I stared a dress version of Coco last summer, however when it got to the trying on stage I realised it just wasn’t going to be a flattering fit. Disappointed and slightly annoyed with it, it has sat in a cupboard out of sight ever since. However that’s no reason why I can’t turn it into another Coco top, which again I’d like to achieve before the end of May.

Mending/Fixing
As well as fixing and adjusting any handmade items in my wardrobe that don’t fit I also intend to tackle my pie of broken jewellery/not quite finished jewellery.

I’m not a huge fan of a selfie (also I’m pretty rubbish at photographing myself) however I do endeavour to record at least some of my MMM16 progress over on Instagram (@nettynot) if you’d like to follow.

Thanks for reading 🙂

Bláithín Cardigan

12 Mar

Bláithín and I have had a rocky relationship! The pattern was bought as a gift for me  by a knitting friend back in 2010! I was very excited about it and printed the pattern straight away. As I started reading it I quickly discovered it would involve STEEKING after breaking out in a small sweat I decided it was a bit advanced for me.

Several years later once I’d got my head around the idea of steeking (& after a practice with the  Sheep Carousel tea cosy), I got the yarn for Christmas 2014 and started knitting Bláithín in February 2015. I made quick progress, getting to the point where I’d be sewing in ends before the actually steeking could commence. Given that I’d be CUTTING the knitting I knew it was crucial that it fitted well before I did this, no going back on this project!! I discovered it was quite baggy around the yoke, I had a ponder and decided I could re-knit the yoke on smaller needles and hopefully that’d sort it out. It was at this point I discovered I had actually knitted the whole flipping thing on the wrong size needles (5mm and not 4.5mm) I have no idea how I made such a daft mistake, but there it was… knowing that the density of the knitting would be important to how well the steek would hold together  I knew I had to re-knit the whole body (I figured I could get away with leaving the sleeves as they were). I ripped it all back (wishing I’d not already sewn the pockets in place). I then couldn’t face re-starting it straight away so it hibernated for a while – well 8 month in the end!

Bláithín pockets - Nettynot Blog

Pre steek blaithin - Nettynot Blog
I started again around Christmas 2015 and got back into it quite quickly. As I have small shoulders and wider hips I started with a size 3 at the bottom and decreased down to a size 1 before joining in the arms and starting the fairisle. Anyone and everyone I know who knits knows how much I love Kate Davies, I’ve knitted many of her patterns, own several of her books and love the way she writes patterns and explains things so clearly. However I do think the neckline of this pattern has some issues which for me has detracted from the  otherwise great pattern. The whole neck ended up quite funnel shaped, which I realise could have been my knitting and not the pattern, so I did what I always do at when something isn’t working…. consult the Ravelry projects and  look at other blog posts and comments. I discovered lots more funnel shaped necks and rolling over tops and people who’d completely reworked their neck lines – so it wasn’t just me. I did find someone’s comment that said they added a extra few decreased before casting off. So I ripped back a few rows, including the last 3 rows of fairisle, I re-knitted on smaller needles (4mm), making my floats a bit tighter and added a further 4 decreases after the short rows, before casting off. This seemed to make enough of a difference and when I tried it on it looked much better.

Blaithin fairisle - Nettynot Blog

The Steeking!
I re-read Kate’s tutorial on her blog about steeking and her clever sandwich steeks, so that I didn’t make any mistakes. I always panic that the crochet reinforcement isn’t going to hold up, but just carefully went with it, trusting the instructions completely. I did the actual steeking with friends at a craftanoon (the morale support was very welcome) and I got one of them to film it for me too.

I quite enjoy picking up stitches, so really liked the sandwich steek technique, however the amount of handling the cardigan once I’d cut it did worry me slightly, I was sure the stitches would start popping out, in reality only a few did and were not detrimental to the finished cardigan.

Steeking edge - Nettynot blog

For more information about the yarn I used and a few more images head over to ravelry http://www.ravelry.com/projects/nettynot/blaithin

There are lots of details I really like about this pattern; the button holes built into the icord cast off, the edging, the pockets, however even after I’d blocked the cardigan I still had a bit of a funnel neck which has settled down a little bit as a wore it for the first time, I’m hoping it settles more with time. I think I might need a bit of distance from this cardigan before I can really appreciate it, having been a bit of a trial at times, it’s also ended up a bit too big for me over the hips, but it still looks ok when buttoned up and worn over jeans – maybe next winter it’ll be my new favourite. Do other people feel a little underwhelmed once you’ve finished a big project?

At least now there’s no excuse for me not to tackle the cross pockets cardigan and get that finished as well! Though I might also cast on the Puffin jumper.

Miette – A finished Project!

31 Dec Darts and eyelet detail Miette - Nettynot Blog

The significance of finishing this cardigan it quite great for me, it is the only garment I have completed in 2015! I’m a little sad about that, only because it’s not a sign that I’ve been too busy, but that I had two garment fails/hiccups, which I have mentioned in previous post. I have done a few smaller projects in between, a panda hat for a friends baby and a lazy lace cowl. But my knitting output has been rather disappointing. So in October determined to turn things around by the end of the year I decided to knit (and complete) a cardigan.

I’ve fancied a shorter cardigan for a while now. I wear a lot of dresses that are fitted at the waist, but I usually wear them with a generic shop bought longer cardigan which rests on my larger hips hiding my waist anyway. Once I saw Jem Weston’s finished Captivate cardigan earlier in the year, which is such a flattering fit, I knew I needed a nice shorter cardigan.

I’ve pinned the Miette cardigan in to my knitting board on Pinterest a couple of times in different guises so decided that’d be the one. After a quick visit to my LYS (Knit Nottingham) I was set and cast on that night. The pattern is written by an American designed Andi Satterlund, for worsted weight yarn which can be a bit tricky as it’s not quite as easily substituted for aran. I went for King Cole Merino Blend Aran and felt fairly confident I could make it work (there’s a few more details over on my Ravelry page).

Eyelet detail on Miette Cradigan - Nettynot Blog

The simple eyelet details around the edge of the cardigan are really effective, easy to follow and added a bit of interest while knitting, which I really enjoyed, especially how quickly it grew. The only challenge I faced was the fact that the tension didn’t quite match up, my knitting was about the right number of stitched but too few rows, so I couldn’t really go up a needle size, however I decided it’d probably be alright as I have a short torso anyway. The only slight issue I had was once I’d separated the sleeves and knitted a few rows, I was able to try it on for the first time and it was a bit snug under the arms, so I ripped it back to above the arms and added a few more rows before separating the sleeves again.

Sleeve increase detail on Miette - Nettynot Blog

This in theory worked and deepened the arm holes enough to be comfortable, but it did make the sleeve increases look a little strange, which if I was to knit it again I would rectify by graduating the increases slightly, however I’m still happy with the result.

Darts and eyelet detail Miette - Nettynot Blog

I really liked the clever darts on the front of the garment and they make a nice feature, though I was a little worried they’d make the cardigan too big in front for me, but I it was fine and makes for a much more flattering and figure hugging fit. I went for longer sleeves as it’s quite a warm yarn and I prefer long sleeves and once I blocked it the yarn relaxed beautifully.

Miette - Back of Cardigan - Nettynot BlogFinished Miette - Nettynot Blog

Now I just need to work on my posing – I never know where to look and how to stand – maybe I can practice with some more finished garments in 2016.

Thanks for Reading!
Steph x

CROSS pockets cardigan

9 Sep The beginning of Cross Pockets - Nettynot Blog

Well I had hoped to be writing a blog post about my wonderful and FINISHED cross pockets cardigan, but the fact is, it’s not going well! I’ve got really fed up about it too, I really want it to be finished, it feels like I’ve been knitting it for so long. My friends Knit In Notts seem to be finishing things left right and centre since I cast this on, including Jem’s lovely Kaneshon Cardigan by Sarah Hatton and Eleanor and Toni’s onesies (aren’t they great), to name a few.

Knit Nottingham 5th Birthday - Nettynot BlogI know I don’t spend as much time as the others knitting, and it’s not a healthy thing to compare yourself to others, but honestly I’m just feeling jealous and frustrated. I have not finished anything that I’ve started yet this year and we’re in to September and that makes me a little sad. I had a disaster earlier this year with my Bláithín cardigan, which ended up being frogged and is now currently hibernating! This was due to me having unintentionally knitted almost the entire thing on the wrong sized needles *hand smacks forehead*! I will complete this someday, but I’m not ready to tackle it again yet.

Blaithin so far - Nettynot BlogThe beginning of Cross Pockets - Nettynot BlogI had been making good progress with the my Cross Packets cardigan, it’s constructed very cleverly and I was really enjoying learning new techniques. As a lot of processes were new to me I have followed the 8 page instructions to the T. But after the long I cord cast off, I decided to sew the pockets in place before knitting the sleeves, I was a little dubious as the inside of the pocket really didn’t look like it would fit and it didn’t, even pinning into place and sewing the top edge didn’t help, as you can see here, it looks baggy and awkward.

Odd cross pockets - nettynot blogSo now I’m left knowing I’m going to have to do some ripping back, urgh. I think the problem is that the lovely basket weave stitch on the edge of the pocket is quite firm and structured where as the moss stitch inside of the pockets it quite loose and the two aren’t matching up, despite having the same number of rows.

Cross pockets i cord cast off - nettynot blogI think what I’ll end up doing is ripping back the cast off I cord, and the decorative edging, so that the pocket front and inside are separated again and continue knitting the pocket front until the length matches up and just ignore how many rows there are. This seems like the sensible thing to do right? I think I’m also going to change the I cord Cast off, I will experiment first, but it is very time consuming and curls up a lot – I don’t want anything to detract from the lovely edging. So maybe just a simple straight forward cast off could work.

I need to discipline myself to ensure I finish this project before I start my next, as I’m very keen to cast on my Puffin jumper, for which I’ve had the yarn for, for a year or so. I might do something a little bit mad and set myself the challenge of completing the puffin in a month, just get myself back on track (and happier – I’m always happy when I’m being productive).

I also booked myself on to a knitting a workshop with the lovely Eleanor while I was at Knit Nottingham’s 5th Birthday party, I will be learning to do Entrelac knitting – something new and exciting to look forward to!
I apologise that this is not the most positive or up beat post, however writing about my knitting frustrations has helped alleviate the disappointment as well as give me a little perspective to how to solve the issues. Hopefully my next knitting related blog post will be full of finished items and accomplishments.

If anyone has any helpful suggestions, please share them with me.
Thanks for reading!

Art Of Inclusion

A Bristol project looking at how to make the arts more inclusive. Funded by Bristol City Council

Own Your Content

Own Your Content is a campaign from WordPress.com & CreativeMornings, encouraging creatives to own their content, platform, and the future of their work.

Create at Oakleigh

Our home renovation journey and all the creations made along the way. Lots of crochet projects and cakes and bakes from my kitchen.

CONTEMPORARY GEOMETRIC BEADWORK

an open source architectural beadwork project from Kate McKinnon and a worldwide team of innovators

Bead Mechanics

Geometric shapes made out of beads!

makeandfable.com/

Make & Fable creates fun and colourful macrame craft kits and patternse and host of creative workshops. Creativity you can wear, make and experience!

Knitigating Circumstances

Because knitting is excuse enough

Boys and Chicken's Sewing Adventure

Previously Boys and Chickens, I have created a new blog to share my sewing adventure as 2018 is they year I plan to teach myself to sew! There will also be bits of crochet and cooking too.

Clotho & Frigg

sewing and design studio

delightfultones

One girl's creative adventure.