Agnes top and Me Made May 2019

29 Apr

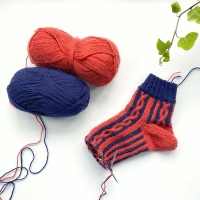
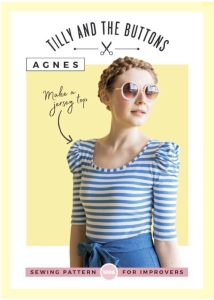
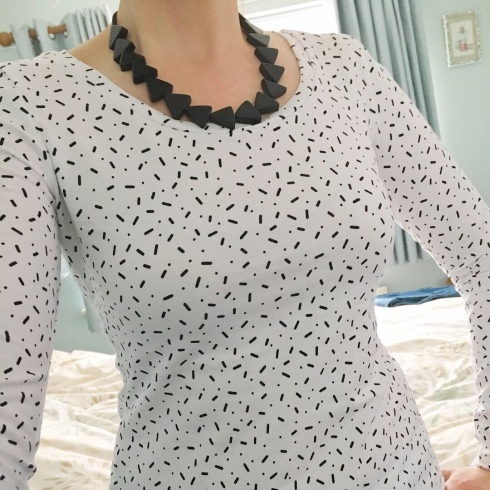
I recently attended a workshop, at Sewing Belle, several friends had attending classes recently I told me how good they were and, for me importantly, very affordable (something that Elaine who runs the classes wanted to ensure when starting up). I signed up for a Tilly & the Buttons workshop, I chose the Agnes top as I wanted more practice with jersey fabric. The pattern and workshop was £30 (fantastic). I found nice but not too expensive jersey from The Little Fabric Bazaar (£11/pm), I always worry what the quality of the fabric will be like when buying online and more to the point, if I messed up my top I didn’t want to have wasted very expensive fabric.

Agnes Sewing pattern - Tilly and the Buttons

I needn’t have worried about the fabric, it was lovely quality and recieved many compliment. I also remembered to wash it before the workshop.

Using the sizing chart on the pattern I knew I’d have to do some grading (as I usually do). I started at the shoulders with a size 2, then to a size 3 at the underarm and bust, size 4 at the waist and out to a size 5 on the hips. I also shortened the pattern by 3cm at the waist (again which I usually do on all patterns) I have a short torso.  I learnt a great couple of tips for speeding up cutting out a PDF pattern, we used rotary cutter on just 2 side of the paper and used a glue stick to attach to the next page – much easier to match up all the lines and re-adjust if needs be (I used to cut them all out and use tape on the back – very fiddly & tidious).

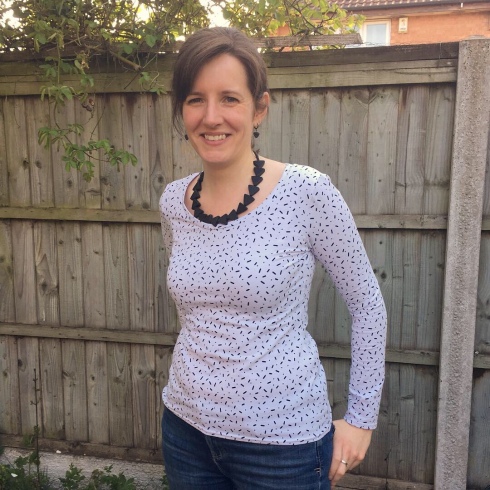
One of the main reasons I signed up for this class in particular was to get to grips with an over locker, I’d not used one since I was at school. I was concerned I’d go wrong, and cut into the fabric. However I just took a deep breath and got on with it, and it went really well (I did do a little test on some scrap fabric first). It made the process so much easier. I also learnt how to use the cover stitch machine for my hems. Both machines made sewing up so much easier, and have given my garment a much more professional finish!

Agnes Top - neckline - Nettytnot Creates

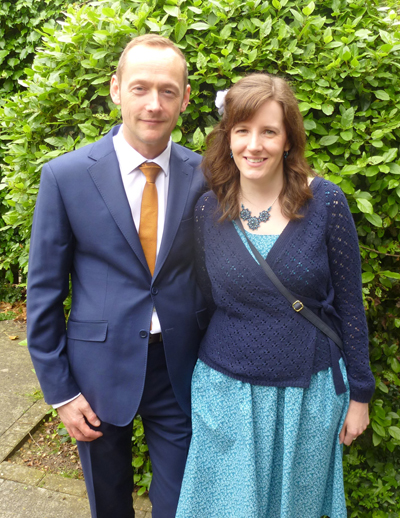
I’m incredibly pleased with the result of this top, I will definitely be making more! I was also impressed that I did the whole process, from cutting out paper pattern to completed garment with ends sewn in, in just one day, 10am – 5pm (with a half hour-ish break to eat lunch). I think that in itself is quite an achievement, and something that I think I could only acomplish at a workshop, away from distractions and with the use of the wonderful over locker! I will definitely be returning for more workshops and to utilising the machines at their drop in sewing sessions.

Finished Agnes top in black and white - Nettynot Createslooking awkward in my agnes top - Nettynot Creates

This has also lead me to join in with Me Made May 2019! (You can find out more about this over on the So Zo blog here) and maybe even get on board yourself…

Me Made May 2019 - So Zo Blog

The whole reason I wanted to get back into sewing several years ago was so that I could make clothes that actually fit me. Clothes shopping is not an enjoyable experience for me, rarely is anything a good fit for my body shape. I don’t actually mind my body, it is what it is and I have accepted that is is mine, which was made much easier by just simply giving up on clothes shopping and substituted it for sewing pattern perusing and making my own clothes! My sewing journey has been rocky, I have made several things that I probably won’t ever wear again, due to the fit not being quite right, or uncomfortable. That said I have learnt a lot from the process!

I really enjoyed Me Made May when I joined in back in 2016, I had less handmade clothes than I do now. However I enjoyed the challenge and it did inspire the makes I went onto create and reignited some love for past makes…

My pledge

I, Steph Gibbs, sign up as a participant of Me Made May 2019. I endeavour to wear at least one handmade garment everyone day in May, with the intention of putting together new combinations from my existing handmade wardrobe and to use this to form a “to be created” list of staple items missing from my wardrobe.

I’ll do a round up on the blog, maybe during, but definately afterwards. I’ll post photos over on my instagram feed @nettynot if you’re interested in what I’ve made wearing.

Thanks for reading.
Steph

Maan Shawl

17 Apr Maan Shawl - knitted by Nettyn

I started knitting my Mann shawl back in Oct 2017. I had fallen for the striking pattern on Moon struck Knits (Natasja Hornby) instgram feed and was intrigued by the technique used when. I had not come across mosaic work before (or certainly not realised if I had), so I headed to Ravelry to discover more about the pattern and see everyone’s completed shawls and in particular see what colour had been used to together. I’m not a fan on brown and beige or anything too subtle, especially in an accessory. So the colours used in the sample for the pattern did nothing for me – which is why the ravelry project page is SOOOO great!

Maan Shawl knitting Pattern

The finished projects that stood out for me, were the bold monochrome with a pop of bright contrast. I really liked a navy, white and red combination similar to this one https://www.ravelry.com/projects/lismete/maan . I had also seen a lovely version with a bright teal in (& we know I love teal). So I sort of had these potential colours in mind when I headed to Knit Nottingham. I very much trust the knowledge of the wonderful staff at my LYS Knit Nottingham, I usually have a bit of an idea of which yarn I might choose, but then get steered towards something I’d not considered, which is a great thing – they really know their stock and know what will and won’t work for almost everything! At the time they’d not long had the new Luxury Merino yarn produced by King Cole. The range of colours is really good, I had decided already on black and pale grey/white for the mosaic sections, so just needed to decide of the bright contrast colour, the red in the range for a little bright for me and the Zoe suggested the mustard yellow (!) Not something I can wear on it’s own (it does not suit me) however as the main colour in this pattern is worked pretty well, though we also decided to swap the white for cream as it was a much better tone all together.

Yarn selection for Maan Shawl - Nettynot creates

I realise that in my brief write up of my project experience a lot has been dedicated to yarn selection. I momentarily thought I should edit a lot out. However I find that selecting your yarn, finding the right fibre for the project and the picking colours is actually a really important and rather exciting part of the process so I am leaving it in! I also feel incredibly fortunate to have local knowledgeable (& wonderful) people on hand to guide me though the yarn buying process. Expertise, passion and knowledge is totally underrated by too many people. (Thank you Eleanor & Zoe)!

Back to the pattern; I loved every element of this pattern, it provided me with lots of new techniques and stitches (St. John’s worth stitch, creates a lovely texture). Even the corrugated rib, which I have done before, but not in this way was interesting. This is a prime example of the kind or project I like to push my learning and challenge myself a bit more. Balancing this with simple knits (as I mentioned in my previous blog post) keeps me excited about knitting and learning.

Stitch textures - Maan Shawl - nettynot creates

I did however stumble at one point during the pattern. I got incredibly frustrated with myself and ripped back a few rows several times as something wasn’t making sense to me. What I’ve learnt to do when things aren’t going well is head to ravelry and look at the comments on the project to see if there’s any mention the issues I’ve experience. If not it is usually down to me misreading things. Which was exactly the case here. I am fully aware that I approach things a little differently; I have dyslexia, which I recently read described as a learning difference rather than learning difficultly. Both are accurate, though the former definitely describes how I feel about it most of the time and the frustration I feel when people want me to do things a certain way (just because that’s how they do them – I’m going off tangent), maybe I’ll come back to this topic in another blog post.

Maan Shawl - knitted by Nettynot

Other than misreading a row in the instructions (which I figured out after by zooming in on images of other people finished projects on Rav & my shawl spending some quality time in the WIP pile). The garter stitch edge had, up to a certain point, been made up of alternating 2 row repeats of each colour, however after the first mosaic section it had 4 rows of the same colour and my mind and hands would not compute this and I kept convincing myself I’d done something wrong. It’s not the first time & it won’t be the last time I’ve done somethign like this & got frustrated. But as soon as the penny droped I fixed my knitting and relaxed back into it.

I did find one aspect incredibly frustrating about the pattern rather than the project. I understand why it was done this way; having written many patterns before, albeit beading patterns, I know it is very laborious when sections are repeated and how to approach diaplying this can be tricky. However I do believe there is a good way to do this and a not so good way. This pattern has several repeated sections, the instructions (to paraphrase) said repeat section CAT, in section CAT it tells go to section DOG… then your on to Section MOUSE where is tells you to repeat section RABBIT and so on….this is all without any page numbers. Needless to say the process induced many big sighs and it was not surprising that I got myself muddled on more than one occasion! In a 8 page pattern which does include page numbers I do not think it’s unreasonable to help the reader of the pattern navigate it easily. What’s wrong with a simple “repeat section CAT on page 2”,  and then repeat steps 1-5 of section DOG from page 1 etc… small rant over!

Complete Maan Shawl - spread over 3 seater sofa - Nettynot creates

That said, I absolutely love my finished shawl, I did make one minor adjustment and that was to remove some of the stripe repeats to make the over all shawl smaller – though it does still stretch across a 3 seater sofa!

Maan Shawl in front of York Minster - nettynot creates

I have worn it lots, I finished it in time for a trip to York back in the beginning of March, our Air BnB host complimented me on it and was amazed to hear I’d knitted it myself, which is always wonderful feeling and went on to say that her partner would have been gutted to miss seeing it as he’d recently got into knitting!

Blocking Maan Shawl - Nettynot Creates

I had a little worried when I cast off as it was quite thick and rigid, however I gave it a good soak in Eucalan wool wash (available from Knit Nottingham), blocked it and was super soft and cosy once it dried. I had unintentionally swapped to a larger needle size half way though, the shawl had a long hibernation period just after I completed the first mosaic section because I wanted to knit other things and I borrowed the needles for something else. I then made the assumption when I picked it back up that, as I was knitting with DK yarn, that I’d been using 4mm needle when I’d actually been using 3.75mm. However I think it’s done me a favour, it’s more drappy now and no one would ever know (unless you’re reading this!)

Thanks for reading!
Steph

Simple Knitting as an effective break

5 Feb Textures of Be Simple Shawl using hand dyed yarn

Sometimes simple is what I want, especially after a long, fiddling or slightly frustrating knit. I chose to knit the Be Simple shawl after I’d completed my Puffin Jumper. It hadn’t been difficult as such but there was a bit of faffing regards lengthening the sleeves at the end, which you can read about in a previous post.

Yarn dyed by Knit Nottingham

I also needed something that I could keep knitting until I ran out of yarn, as the lovely Eleanor of Knit Nottingham gifted me one of her first batch of hand dyed yarns, it was a 4ply (Cotton/wool blend, we think, neither of us could quite remember after the fact), but that didn’t matter, Eleanor had used colours she thought I’d like & it had turned out wonderfully!

Textures of Be Simple Shawl using hand dyed yarn

A mixture of grey turquoise and blue, it knitted up nicely with colours pooling and striping, I’m curious as to how the yarn would have worked in a pair of socks, though at the time I was not back into knitting socks. The shawl was a simple and enjoyable knit and I love the end result. for some time I had felt each new knitting project I selected had to be more complex and intricate from my previous one to challenge myself and improve and learn. I still like to challenge myself, but I also like to relax and just knit something from time to time, and that’s ok!

Be Simple Shawl knitted by Nettynot

Still looking and feeling a bit awkward in photos – at least a shawl is easy to model 😛 

I’d finished my be simple scarf/shawl at the wrong time of year, just as it was nicely warming before summer, so it got put away ready for Autumn, which actually is lovely to do, it’s like a little gift to your future self. It turned out to be the perfect indoor scarf to wear at work which can be rather chilly being in a beautiful Victorian building.

be simple shawl- knitting - nettynot creates

I wouldn’t hesitate to knit another simple shawl for a relaxing project and I’d definitely knit more of Eleanor’s yarn, I’ll just have to be fast, she usually just dyes yarn for special shop events and if you’re not there when doors open you might miss out!

(Since writing this I have started knitting sock again and managed to buy more of Eleanor’s yarn at the shop Birthday event)!

Lovely new Yarn from Knit Nottingham - Nettynot Blog

Thanks for reading!

Steph

Blue raglan sleeve jumper

16 Jan

I used to pick knitting project that would challenge me, each new project I picked had a different element or a more challenging construction/technique, I was eager to learn. I’m still eager to gain more knowledge and try new things however I’m making more practical about (some of my) projects based on filling gaps in my wardrobe or using yarn I already have.

I knitted this jumper based on the yarn I had rather than the pattern. I’m so used to selecting a pattern first, particularly when knitting a garment. I still have almost a whole bag of cashsoft 4ply yarn I bought about 8 years ago in a sale. It seemed like a great idea, buying a garments worth of yarn at the time, but I haven’t found anything quite right to use it for. The yarn for my jumper was actually a gift, well half of it was. I was given 3 or 4 balls, not quite enough to do anything substantial with and so it had been in my stash for a few years. I actually ended up using it quite by accident. While visiting my LYS, Knit Nottingham, having gone in to buy a lighter weight cardigan pattern and 4ply yarn, I clocked the yarn I already had which sparked a conversation about it, and the revelation that it was soon to be discontinued. So I abandoned my initial ideas and bought the rest of the yarn, which would be enough for a garment.

The yarn is called Amalfi a DK weight, produced by Sirdar, 75% cotton & 25% Viscose, it’s nice and drappy and perfect for milder wintry days. The colour I used was an electric blue shade (capri 757) which has a variegated turquoise and bright green/yellow strand (possibly the viscose percentage) running through it. As the yarn itself had some texture I didn’t want to knit anything too detailed as it would get lost in the fabric so I opted for a simple jumper and added a straight forward ridged stripe.

I really enjoyed this knit, it was pretty quick (which is always satisfying). I did a proper tension square (washed it & everything), what I enjoyed most, although I roughly based it on the Brick pattern, was the mathematical challenge. I know this come as second nature to many. However as I mostly knit for pleasure and love following others patterns, it was a nice gentle challenge to measure, calculate & knit for a change.

One feature I did want to note, was the folded hem, a decision I came to with the help of Knit in Notts (knit group) after I realised a 1×1 rib just wasn’t working, it made the jumper look frumpy and awkward. The last “stripe” section I knitted on a needle size small than the rest of the jumper, then folded under and grafted in place. I REALLY enjoyed sewing the hem, I thought it’d be a long boring process but I found it rather relaxing. I now have a jumper that hangs as I’d hoped with no clinging.

It’s not the most ground breaking, interesting or exciting garment. However it fits, it suits me, I’ve worn it loads already having finished it at the beginning of November (in time to wear to the Nottingham Yarn Expo – though not all the ends were sewn in). I’m enjoying having a hand knitted jumper that I’m happy lounging around in. It was the perfect weigh for the mild December weather we had. What I’ve also found interesting is that, I’m not sure I would not have chosen this yarn myself, but I really like the finished jumper. It may have opened my mind a little regards yarn selection in the future.

blue raglan sleeved jumper - nettynot creates blog

One thing I always struggle with is posing for photographs in my handmade garments I’m not really a poser, I’m not naturally photogenic either. I used to resist ALL photos, however the older I get the less I care so much. However I look at past photos in my jumpers, cardigans or dresses and I’m always stand weirdly, grimace, or just look plain awkward or bored. I’m not vein or self conscious enough to keep chopping off my head in photos, which I have done many time before. So I decided to embrace my daft side…. This “pose” does at least remind me of that sense of accomplishment when you cast off a project, try it on and it fit you perfectly!

You can see more details about my jumper (if you’d like) in my ravelry projects here.

Thanks for reading.

Steph

Make Nine 2019

2 Jan

I always like perusing everyone’s “makenine” instagram posts, in the past it has inspired additions to my favourites or even my queue on Ravelry. However I have never listed 9 makes for myself before. I don’t like the idea of putting that pressure on myself, creating a wonderful list of complicated inspiring garments that, let’s face it, I would have to spend every spare minute making to complete in a year.

However, I have decided to make a list this year to help keep my focus. 2018 was a year of knitting what I fancied, not finishing things before starting other projects, which has left me with a fair few WIP’s.

I am using my #makenine2019 as an opportunity to create a list of aims, made up for of WIP’s, knits I have already bought the yarn for, 2 sewing projects I have already bought the fabric for and a few projects I have been intending to do but as yet haven’t. AND do you know what, if I don’t do them all, it’s fine! No one will die, it won’t be the end of the world and I can make them in 2020 instead! However wouldn’t it be nice if I did complete them all….

Make Nine 2019

I have detailed them here as a reminder to myself (or if you’re interested) and so I can keep track of things.

(Top 3 left to right)
1. Crochet – this will be a new one for me, I haven’t ever crocheted a garment before, but I do love the look of this & it’s been a topic of discussion at Knit group!
Pattern is Granny Rocks Jumper by Iron Lamb
2. Socks! I have a pair to finish, and yarn for at least three more. I want to learn new technique and get the perfect fit!
3. My Maan shawl by Natasja Hornby an on going WIP, started in October 2017 that I really would like to finish!

(Middle 3 left to right)
4. Sewing; I have wanted to make a Moneta dress by Colette Patterns, for ages, I didn’t find time in 2018 despite buying (and washing) the fabric.
5. My Arboreal jumper by Jennifer Steingass was started on holiday back in February 2018, I knitted the colour work yoke and it have been hibernating ever since, for no other reason than getting distracted by other projects, though I did pick it up again over Christmas.
6. Another sewing project; as soon as Tilly & the Button released the Zadie dress I knew I wanted to make it, the style of the dress tends to suit my body shape well, though at the time my sewing ability was a little wobbly. So 2019 will be the year to tackle this.

(Bottom 3 left to right)
7. My summer wardrobe is missing a lighter weight, v-neck, 3/4 length sleeve cardigan (in a lovely berry-ish shade), ravelry searches have failed to reveal the ideal cardigan, so I may well make design my own.
8. Diesis by Alice Caetano, I fell in love with this jumper on the PomPom stand at Yarndale in 2017 and bought the magazine based on this design alone. However I’m yet to start and I’m I keep wondering whether I’ll get enough wear out of it, I imagine it’ll be very toastie.
9. Glenfiddich by Annamária Ötvös I bought this pattern for my Mum to knit me a cable cardigan for Christmas 2017, I’ve always found cables a bit frustrating. However since my Mum didn’t get on with the pattern and ended up knitting a different cardigan. I thought this would be the perfect time to bite the bullet and get to grip with cables. It is such a lovely cardigan, and one I can image getting a lot of wear out of. I have already have the yarn too!

I am quite sure I will veer of this path a little, I have given myself a get out of jail free card on number 8.  I have already been um-ing & ah-ing over this pattern for a while. I’m sure I’ll change my mind more than once about these projects throughout 2019. I will be interested to see how much of a detour I take when I look back this time next year!

Here’s to a creative and productive 2019.
Thanks for reading.
Steph

Hybrid Cardigan

30 Dec

Once I’d selected my fabric  I used to create my latest dress, I knew I’d want to make a cardigan too and I already had in mind the yarn & colour, which would match the teal flowers on the fabric brilliantly. The yarn I had in mind was the 4ply Bamboo cotton from Knit Nottingham, by King Cole. I’d already used the dk for my tee shirt and cross pockets cardigan, so knew it’d make a great summer garment.

So off to ravelry I went to figure how much yarn I’d need. I already knew the style I wanted, a fitted waist with a v-neck, maybe a slight peplem/or flare over the hips. Using these criteria I used the ever so useful filters on the pattern search and eventually came across this version of Kim Hargreaves Blossom cardigan (from her book Misty) by  Madhatter (project persil).

madhatter
Isn’t this stunning, I really liked her adaptions, getting rid of the faffy picots, and adding longer sleeves. I decided to create a similar version of this variation. I excitedly headed off to knit Nottingham to get my yarn only to discover the yarn is no longer available in 4ply (!!!).

Back to the drawing board slightly, the yarn was still available in dk, I checked there wasn’t anything else suitable in a 4ply before settling on the dk in the lovely opal colour I’d already set my heart on. I thought I’d have a go at making a similar style cardigan in dk weight.

Fabric and yarn - nettynot blog
I went back to rav and had another search and came across the fleurette jacket, while scanning through the various incarnations, all 126 of them, I spotted someone I knew (what are the chances). Rachel from my knit group had knitted this very same garment for her own wedding, before I’d ever met her (small world indeed) she’d made some lovely adaptions too including cables and a different lower section.

So I made up my mind. I was going to base the top half of the cardigan on the fleurette jacket, as I rather liked the construction of the sideways waist band, I also liked the plain stockinette on the top, though not a big fan of the lacy half. So for the bottom I was going to wing it and create my own peplum, inspired by the blossom cardigan.

I initially liked the way the pattern was written, it was very much written to tailor the fit and size as you’re knitting. I imagine this might be a little daunting to someone who isn’t a confident knitter or who isn’t familiar with negative ease. I feel I’ve already made enough mistakes and worked with this yarn before that I could predict how the garment might fit and knit accordingly. I have noticed from the finished projects on Ravelry that people have struggled with this. I was keen to get going so cast on straight away (abandoning all other WIP’s) I really liked how the waist band was knitted first, then stitches picked up to knit the top. I was making quick progress and then came to the set in sleeves. I’ve knitted at least two other garments with set in sleeves and don’t remember getting into a pickle. But I could not make any scene of the instructions here (quick Rav consultation and I found others had had the same issue). So I decided to research alternative ways and found Knitionary’s blog post about set in sleeves, which was a bit of a hallelujah moment for me. It’s so clearly explained and I will be referring back to this for future project I’m sure!

Teal Hybrid Cardigan - sleeve - nettynot creates

Teal is one of the trickiest colours to capture, it’s not this dull in real life!

I’m trying to get into the habit of updating my Ravelry project notes as I go, particularly if I have issues as I have found them so helpful when I’ve looked at other peoples project notes (and when I’ve revisited my own projects). Sometimes, as I just mentioned above, knowing I’m not the only one with the same issue. Or, no one else has a problem with this (it must be me – put project down, make tea, come back to it, spot the error of my ways and resume).

Teal Hybrid Cardigan - set in sleeves - nettynot creates

Again, the yarn is not this blue either!

Once the sleeves were set in I tackled the peplum edge. I purposely didn’t read the instruction for the 4ply blossom pattern as I didn’t want it to muddy the waters for me now that I was working in dk. I realised I needed to to do the button band first so that I could make my peplum edge meet at the front edge. Then I picked up all the stitches around the bottom and then increased as per first line of the fleurette jacket and then started winging it.

Teal Hybrid Cardigan - Peplum - nettynot creates

I worked on a long circular needle back and forth in garter stitch and made sure to make notes as I went as I’ve have to do the exact same thing, in reserve as I work round the edge of the cardigan. I initially increased to make a nice shaped curve at the front of the cardigan (this was the fiddliest part, I ripped it out a few time). I made 4 simple short row increases / decreases for the hips, on each side, and curved the edge at the end decreasing (following my increase notes from the start).

Teal Hybrid Cardigan - Blocking - nettynot creates

Teal Hybrid Cardigan - Jemdrew wedding - nettynot creates

A bit of summer day light – this is what the colour is really like. I need to work on my poses when showing off handmade garments…. it’s not wonky in real life!

Overall I’m really impressed with how it’s turned out, it goes really well with my dress too, just a shame it was too warm to wear it at the #jemdrew wedding (though did get a snap of me in it, though not the best photo). It is a bit of Frankenstein cardigan, but that’s what makes it special. I’m also impressed with myself. I finally feel I have a really good understanding of my abilities as a knitter (I’m generally not very good at admitting things like this as an introverted Brit) however this project has proved to me I can do this and I’m too bad at it either – it’s only taken 14 years. My only hope now is that in another 12 years my dressmaking will be as good, ha!

My ravelry project for my hybrid cardigan can be found here.
Thanks for reading
Steph

Side Note – I wrote this blog post back at the beginning of October, with the intention of getting a few good photos of me wearing the cardigan at another wedding in Oct (the lovely Eleanor & Dr Chris of Knit Nottingham fame). I did wear the cardigan, however I was having too much fun ceilidh-ing to remember to take a photo). Then I just got busy with other things and then when I looked back at my #2018bestnine on instagram I realised I hadn’t actually posted it – better late than never though!

Floral Dress

1 Sep

If you read my last blog post you’ll know the trials of getting to this point and I’d almost finished this dress at that point. I was getting quite excited as it was fitting really well and definitely my best make to date.

I’m feeling far more confident about under stitching, zips and dart, which has come with practice. Zips no longer fill me with dread (button holes are another matter entirely).

I chose the bodice of a vintage style dress pattern called Bette that came from Sew magazine back in September 2009, it was a simple shape with just one bust dart from the waist and strap in a more flattering position for me. I teamed it with an ever trusty emery skirt (with pockets).

My first bodice toile dictated I needed a few alteration but not much, it just came out a little bit big around the arm hole and a touch tight on the waist, so I went down half a size on the shoulder/bust sizing and graded out with curved seams to 2.5 sizes larger at the waist. I took my usual 2.5cm out of the length and I also lengthened the bust dart and back dart by an extra 1cm. This did the trick.

When I’d finished the dress (the Wednesday before the lovely Jem & Andew’s wedding on Saturday) I was very happy – I’d tried it on, the fit was great, it didn’t feel too snug or look baggy and it felt comfortable. I was feeling rather pleased with myself.

floral dress - nettynot blog

Within half an hour of wearing my dress it had rubbed my arms raw! They’d quickly got uncomfortably sore, having resigned myself to the fact that there was NOTHING I could do about it I just decided to get on with things and ignore it and although my arms remained sore, it really didn’t really bother me too much, and the initial rubbing occurred while we (the unofficial bridesmaids) were plating up cakes and carrying trays of tea cups so possibly the most active part of the afternoon (before the dancing starting later on) so maybe it just wasn’t bothering me so much or mind over matter came into full force. That said I was very please to get home, take off my dress and smother my raw patches in Sudocrem (they were much better by the morning).

Having spent a lot of money (for me) on this fabric and genuinely loving the dress, I do not want it to become yet another handmade dress that is worn once and sits in the wardrobe forever more. So I have decided to try and fix the issues. I actually have enough fabric left to cut another bodice if I need to, however I thought I would just simply try and fix this dress.

I am going to attempt to make the problematic front arm holes and straps a little slimmer and hope this works. I don’t really have anything to lose by trying to fix the existing dress, I don’t know if this will work, I fear I will just make the arm holes gape too much, but we’ll see. Wish me luck.

Alpacas at Jem Weston's wedding - nettynot blog

This photo was taken many time, not one of them had us all looking at teh camera, but I liked this one. The wonderful Eleanor of Knit Nottingham, the lovely Jem Weston, me & some Alpacas (guest of honor at Jem’s wedding)!

As a side note, I would highly recommend reading Jem’s post about her Wedding top, yes she made it! It’s stunning, isn’t it? A lot of time, effort, patience, beads and a few tears went into it! My trials and tribulations with a simple dress pale into insignificance in comparison, but well worth the work!

The lovely floral fabric was from Guthrie & Ghani, a cotton lawn called Mulberry Magnificence.

Thanks for reading.
Steph


Dresses for weddings…

8 Aug

I decided back in March, as I had 3 wedding to attend this year, I could make a dress & knit a cardigan and wear the outfit to all 3 weddings, simple! I selected the fabric and bought it on a fabric trip to Birmingham &  Guthrie and Ghani with the lovely Jem Weston who was shopping for her actual wedding top fabric (Jem’s wedding being wedding no.2 for me this year)  – you can read Jem’s post about the fabric trip here.  Jem’s friend Rosie also bought lovely fabric to make a dress for Jem’s wedding (looking forward to seeing the finished dress). Obviously I then headed to Knit Nottingham to select a lovely summery yarn to go with the gorgeous fabric.

Fabric and yarn - nettynot blog.jpg

I had already decided which dress I wanted to make, having made a Lilou dress (from Love and first Stitch by Tilly and the Buttons) for a previous wedding a couple of years ago I knew I wanted to make a sleeveless dress but I also didn’t want to cover up the lovely flower print with pleats so decided to make the skirt gathered and also add pockets so I used the bottom half of the Emery dress by Christine Haynes, which I’d also made and wore to a wedding 2 years ago.


I knew I needed to do a bit more work on the fit of the lilou bodice as my first dress wasn’t perfect, doesn’t look too bad here, but I re-tried it on and it’s not great. Too roomy over the bust and sat awkwardly over the shoulders so I made a few small tweaks to the pattern and cut a smaller size. I had help from Jem and Rosie (different Rosie) at our knit group’s spin off  sewing gathering, getting the darts fitting my shape better. I made these adjustments, whether they were the right things to do or not I’m not sure….
– Graded from size 3 at shoulders to size 4 at the waist and curved the side seems.
– Took 2.5cm out of the bodice length (I have a short torso, I did this to the first dress too).
– curved the darts inwards on the back.
– extended the back darts by 2cm.
– cut down the arm holes by 0.5cm.
– Trimmed 1cm off the back pieces graded from sides to center back.

I was feeling apprehensive about the over all fit, so decided to buy some cheep polycotton from the market and did a full (wearable) toile. I’m glad I did, it didn’t turn out too badly, it fitted and looked ok. The fabric felt cheap and a bit crinkly, however it did resolve an issue, which was that it wasn’t so much that it didn’t fit me ,more that I just didn’t like the fit, if that that makes sense; I realised I wasn’t a fan of the strap positioning, they come in too much on the shoulders highlighting that fleshy underarm bit and exposing my bra straps at the sides (I don’t think it helped that I think the finished dress is actually a touch too small). Please bare in mind that these photos were taken at the end of a long day (at wedding no 1 –  my Boyfriend’s bothers wedding), complete with frizzy rained on hair, (I was literally about to crash into bed and then thought…quick get a photo of the dress – as you do – and stuck my feet back into my shoes – these were the best ones :/ …. second photo was just to show off the pockets & the lilac lining)!

Having deciding that the Lilou dress wasn’t for me or my lovely posh fabric, I didn’t have the time to make a toile of an entirely new bodice, before wedding 1 hence wearing the polycotton toile, which wasn’t so bad.  Also doing this meant I didn’t have to rush to finish knitting my cardigan as it didn’t go with the fabric I’d used. Instead I had a look though my existing hand knits and found a navy lace cotton wrap cardigan I’d knitted to wear at yet another friends wedding about 5 years ago (YES there’s a definitely theme here). I haven’t worn the cardigan much since as it slips off my shoulders A LOT, so decided to address this and I unpicked the edging, resewing it back on, making a shorter edge. I also added some ribbon in  between the shoulder seams inside, to help stop it slouching off any more. This worked well and with the wedding being pre-heat wave at the start of June I wore it all day (this will be a test to see if my boyfriend reads my blog, he’s not a fan of having his photo taken, I happen to think this is a lovely photo – despite my mad/unruly hair).

At the Wedding - Nettynot Blog

I also made a necklace to match. Based on a workshop I designed for work; Mandala Pendant.

Necklace to macth dress - nettynot blog

I felt the lilou dress making was a useful exercise. I often find dressmaking incredibly frustrating (unlike knitting which I find incredibly relaxing). This is because I had delusions about making my own dresses, that it would mean they would fit beautifully, and that is sort of true, but not without a huge amount of work and I don’t have enough of an understanding or experience yet to know how to adapt patterns to fit me well.  I’m an odd, short pear shape (which is fine). I often increase from shoulders to waist by 1 size and then waist to hip another size, I have a short torso and a bust size smaller than most patterns cater for – that’s a lot of adapting.  I’m not confident enough to do a small bust adjustment yet and so have managed to adjust darts and side seams enough to take out the volume needed.  I realise this will come with practice and experience (and a lot of patience) but I do find it exasperating sometimes – if anyone has words of wisdom on this subject or similar experiences I’d love to hear them!

My new dress for Jem’s wedding is almost complete now and fitting quite well (whooh, *happy dance/prance*), so I will write a post about that soon too.

Thanks for reading.
Steph


Sew Organised

25 Jul

I’d been thinking for a while that I needed a better way to store my sewing scissors and related paraphernalia (isn’t that such a lovely word). I’m constantly moving everything on and off my table and it all ends up piled up in a bit if a jumble.

Wire Basket - Nettynot Blog.jpg

So when I was recently having a tidy in my garage and rediscover this wire shelf and hooks I use to store and hang my jewellery from, I had a wave of inspiration. The hooks are a perfect size for scissor handles, however the reason I stopped using it was the awkward gaps in the wire shelf, I used to loose things through them and get bracelets stuck between the wire. So I thought I would just make a little fabric cover to sit in the shelf to stop items dropping though. This idea brewed for about a week until I had a bit of time to sit down and actually make it. In that time the idea had brewed into a small piece of patchwork.

Cut fabric - mini patchwork - nettynot blog

I kept it simple with straight forward squares (I cut 2” x 2”), to make a 9 by 6 square mat. I made it a little longer than I needed so I could tuck under the edge which would be visible from the front.

Sewn fabric - mini patchwork - nettynot blog

I often wonder whether I’m a bit crazy for keeping so many small faffy bits of scrap fabric, however they came into their own for this little project!

Fabric scraps - Nettynot Blog

I think as long as I limit it to just this one box I can justify it (the lid does fit on, honest)!

Hooks in Sewing Room - Nettynot Blog

I think the finished shelf and hooks look great, I like it below my colour collage, and will be so handy right above my sewing table.

Finished hooks - Nettynot Blog Post
Sewing Table - Nettynot Blog

It’s not the most attractive sewing table, however it is perfect for what I need, my sewing space doubles as the spare room, so I need something that is a sensible size, can fold down small, is pretty solid, I don’t mind about scratching and I found it in a local charity shop for £20!!! One of my best finds, I had a little sand underneath to see if I could remove the dark varnish and it looks pretty good under that horrid finish, so maybe that’s a project for the future!

Side note…

I did also sort out storing my ever expanding jewellery collection sometime ago with another flash of inspiration! I simply hammered large nails into a piece of wood I’d painted, then glued buttons to the heads of the nails (to make it look less industrial), it’s not perfect but very functional and I love it. Having this much jewellery is unavoidable when you work at a Bead shop and design jewellery as part of your job (that’s my excuse & I’m sticking to it!)


Thanks for reading!
Steph

Two little Magpies – Screen Printing

4 Jul

Back in May my Boyfriend & I went on a screen printing workshop at Two little Magpies in Beeston. I’ve been following them on Facebook & was delighted to see they run workshops on Wednesday evenings as well as Saturday’s. I often miss workshops I want to attend as they mostly run on a Saturday when I’m usually working, also teaching Workshops. With Wednesday’s being my day off I don’t even need to rush around getting there.

We started off by creating simple stencils from free style cut and torn paper, I kept it straight forward & created several leaves from folded paper in different sizes & then decided to arrange them around a central stalk. I love the combination of red & grey together (the colour theme of my bathroom) so for my first print used grey paint on red paper. I loved the result and my first print of the evening ended up being my favorite of the whole workshop.

Red & Grey print - nettynot blog

First Print up and framed in my bathroom.

I actually printed a couple of this design in different colourways, unfortunately I did not get my stencil quite central so I had to trim down the edges, not the end of the world, but I do quite like the rough edges on screen prints, adds a bit of charm and maintains the hand made quality. I have added some blue leaves to my bedroom picture shelf too.

Bedroom shelf - nettynot blog

Having done some screen printing before I knew what I could potentially created and I had planned to go with a pre-prepared stencil, but as these things go I wasn’t organised enough & I ran out of time beforehand. So when it came to creating a second stencil from the various prepared ones provided, I had a bit of a mental block. So just dived in and had go, as a result I didn’t really like my second run of prints, (birds in a sky full of airplane trails). I also took inspiration from another participant & printed some simple large cheese plant leave. They came out alright, but just not destined for a wall any time soon.

All was not lost with these prints as I have since turned several parts of the prints I made into birthday cards for friends, I think picking and choosing the best bits has worked well.

I really enjoyed the few hours just experimenting and producing art work in a simple and fun way, especially given that it’s not the easiest thing to set up and do at home. My boyfriend who hasn’t really done craft workshops before, enjoyed it too, though he was gutted to accidentally get some pink paint on his favorite print of the evening. However I have since managed to rescue it, I wish I’d taken a before picture so you could see what I’ve done, basically there where two smallish, but obvious splodges near the middle and top, so given their positioning I decided to add some bubbles coming from the fish, in my vast array of random paper and crafty bits & bobs I had the right colours of card to make them look at part and I think it turned out quite well. You’d never know it wasn’t supposed to be like this (except for the fact I’ve told you all here).

Rich fishes - nettynot blog

Two Little Magpies is a great little shop providing a variety of workshops, selling gifts and handmade goods, I’m sure I’ll be back from more workshops. I took the opportunity to have a good browse too, I don’t always have the funds or space to splash out on large handmade pieces. However I often buy a card or two, as it’s a great way to support local independents and they have a great range of cards. I absolutely loved all the designs by Karoline Rerrie, who’s a screen printer, her vibrant Scandi style images just jumped out at me. I spent a while choosing, as I wanted them all, but settled on these 3, I’m now on the look out for a frame (or 3) to put them in as I’m going to keep them all!

Karoline Rerrie cards - nettynot blog

Thanks for reading!
Steph

Art Of Inclusion

A Bristol project looking at how to make the arts more inclusive. Funded by Bristol City Council

Own Your Content

Own Your Content is a campaign from WordPress.com & CreativeMornings, encouraging creatives to own their content, platform, and the future of their work.

Create at Oakleigh

Our home renovation journey and all the creations made along the way. Lots of crochet projects and cakes and bakes from my kitchen.

CONTEMPORARY GEOMETRIC BEADWORK

an open source architectural beadwork project from Kate McKinnon and a worldwide team of innovators

Bead Mechanics

Geometric shapes made out of beads!

makeandfable.com/

Make & Fable creates fun and colourful macrame craft kits and patternse and host of creative workshops. Creativity you can wear, make and experience!

Knitigating Circumstances

Because knitting is excuse enough

Boys and Chicken's Sewing Adventure

Previously Boys and Chickens, I have created a new blog to share my sewing adventure as 2018 is they year I plan to teach myself to sew! There will also be bits of crochet and cooking too.

Clotho & Frigg

sewing and design studio

delightfultones

One girl's creative adventure.